How to Rebuild Forks on a Dirt Bike
Dirt biking can be a lot of fun, but it’s important to know how to rebuild forks on a dirt bike if something goes wrong. When you ride a dirt bike, the forks take a lot of abuse. They can easily get clogged up with mud and dirt, which can make them difficult to steer.
If your forks are damaged or worn out, it’s important to rebuild them so you can continue riding safely. In this article, we will show you how to rebuild the forks on a dirt bike. We will also provide some tips for keeping them in good condition. Let’s get started!
Materials You Will Need
- A set of fork seals
- A set of fork bushings
- A set of dust covers
- A set of washers
- A set of spacers
- A set of bolts
Importance of Rebuilding Forks on a Dirt Bike
- Forks are important part of a dirt bike as they help to absorb shocks from bumps and jumps.
- If forks are not in good condition, it can cause the rider to lose control of the bike.
- Forks can become damaged from normal wear and tear, as well as from crashes.
- When rebuilding forks, it is important to inspect them for damage and replace any parts that are worn or damaged.
- It is also important to make sure that the forks are properly lubricated and that all of the seals are in good condition.
8 Steps Guide on How to Rebuild Forks on a Dirt Bike
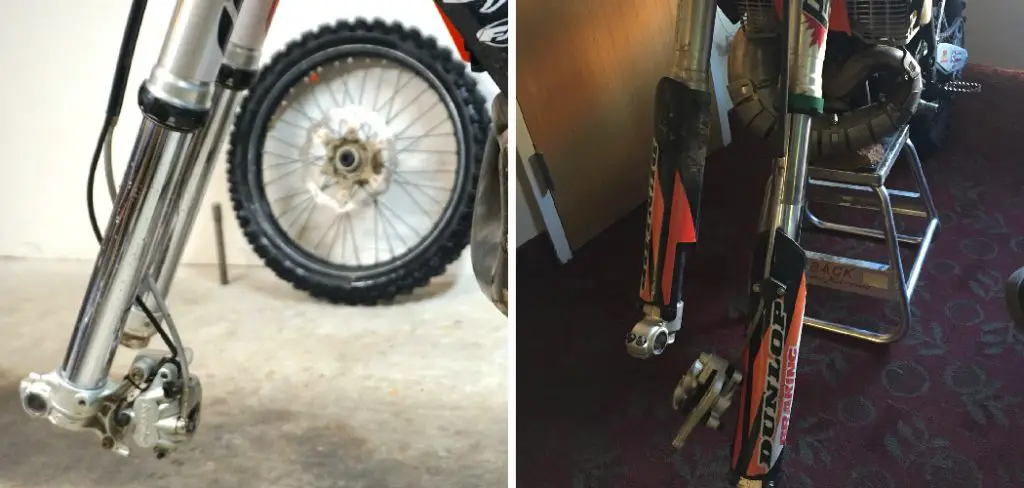
Step 1: Remove the Old Fork Seals and Bushings
The forks on a dirt bike see a lot of abuse, so it’s not surprising that they occasionally need to be rebuilt. Fortunately, this is a relatively straightforward process that can be completed at home with a few basic tools. The first step is to remove the old fork seals and bushings.
This can be done with a seal driver or a screwdriver wrapped in tape. Once the old seals and bushings are removed, the next step is to clean out the fork tubes. Any dirt or debris should be removed to ensure that the new seals and bushings are able to seat properly. Finally, simply install the new seals and bushings and you’re ready to hit the trail again.
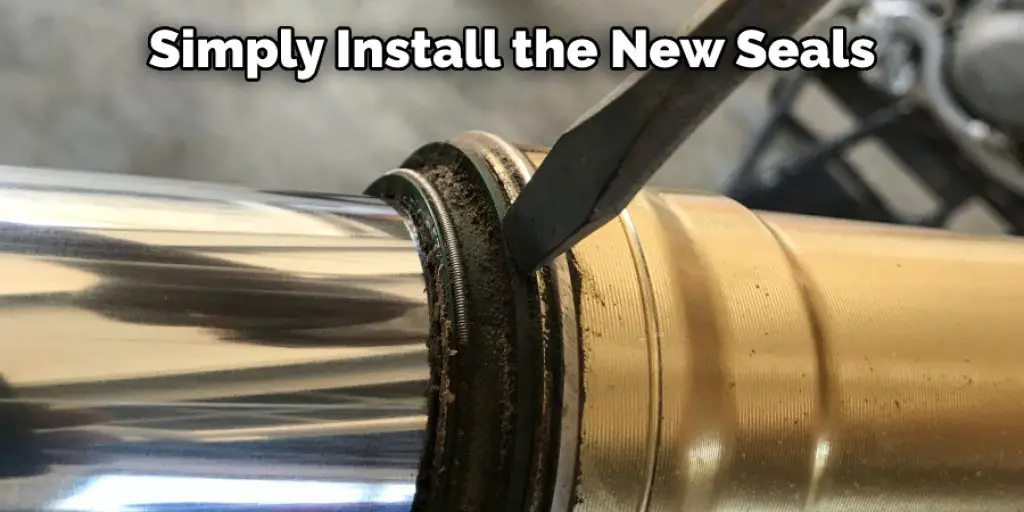
Step 2: Install the New Fork Seals and Bushings
Motorcycle mechanics often find themselves having to replace fork seals and bushings. The process is not difficult, but it does require some patience and attention to detail. The old fork seal and bushing must be removed.
This is usually done by unscrewing the bolts that hold the seal in place and then prying it out with a screwdriver. The new seal and bushing must be installed. The seal will need to be lubricated with a small amount of oil before it is inserted into the fork tube.
Once the seal is in place, the bushing can be slid into position and secured with bolts. With the new seals and bushings in place, the fork should operate smoothly and without leaks.
Step 3: Install the Dust Covers
There are a few things more essential to the performance of a dirt bike than its forks. The forks are responsible for dampening the shocks created by bumps and jumps, and they also play a role in steering.
The forks can become worn down, impacting the bike’s handling and making it more difficult to control. One way to restore the performance of your forks is to install dust covers.
Dust covers help to protect the internals of the forks from dirt and debris, and they also help prevent premature wear. In addition, dust covers can improve the seals on the forks, reducing oil leaks and further protecting the internals.
As a result, installing dust covers is an effective way to rebuild your forks and improve the performance of your dirt bike.
Step 4: Install the Washers
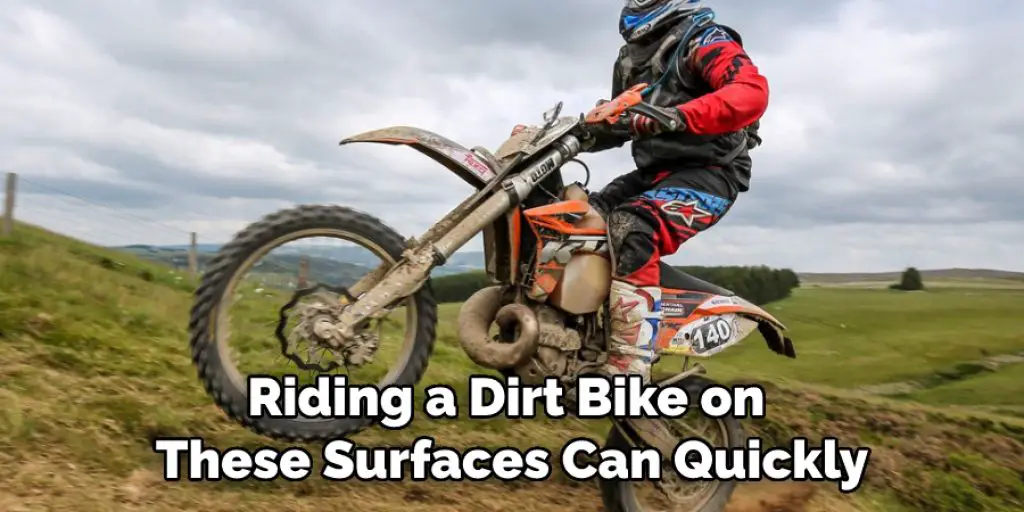
Dirt bikes are designed to be ridden on rugged, off-road terrain. They feature large tires with deep treads that provide good traction and allow the bike to float over loose sand, dirt, and gravel.
However, riding a dirt bike on these surfaces can quickly wear down the tires. To help extend the life of their tires, many riders choose to install washers on their dirt bikes. Washers act as spacers between the tire and the rim, preventing the tire from rubbing against the metal.
This helps to reduce wear and tear on the tire and prevents flats. In addition, washers can also help to improve traction by keeping the tire’s treads in contact with the ground. For riders who frequently ride on rough terrain, washers can be an essential component of their bike setup.
Step 5: Install the Spacers
Before you start your installation, you’ll need to gather a few tools. You’ll need a drill, a 1/8″ drill bit, a hammer, and something to mark your wall with like a pencil or pen. You’ll also need your Spacers, of course!
Once you have everything, find the first spot you want to install a Spacer. Using your drill, create a pilot hole at the top center of the Spacer. Take your hammer and gently tap the Spacer into the pilot hole until it’s flush with the wall.
Make sure it’s level before moving on! Repeat this process for each Spacer you’re installing. And that’s it! In just a few minutes, you’ve installed your Spacers and are one step closer to that perfect gallery wall.
Step 6: Torque the Bolts to the Proper Specifications
Before you begin the process of torquing the bolts, it is important to familiarize yourself with the proper specifications. The amount of torque, or twisting force, required for a given bolt depends on its size, threading, and material.
Too much torque can strip the threads or break the bolt entirely, while too little torque will not provide a secure connection. Once you have determined the proper torque specification for your bolts, you will need to select the appropriate tool. A torque wrench is the most accurate way to apply the required amount of force, but a regular wrench can also be used if necessary.
Start torquing the bolts, it is important to make sure that all of the parts are properly aligned. Once everything is in place, tighten each bolt until you reach the specified torque level. Be sure to check the bolts regularly to ensure that they remain tight.
Step 7: Install the Fork Caps
Fork caps are often used to protect the forks on a bicycle. They are designed to fit over the top of the fork, and they help to keep the forks from being damaged by debris or other objects.
Fork caps also help to keep the forks clean, and they can be removed and replaced if they become damaged. Fork caps are typically made of plastic or metal, and they come in a variety of sizes.
Some fork caps also have a built-in safety feature that prevents them from coming off while the bicycle is in use. When choosing fork caps, it is important to select the right size and material for your particular work type.
Step 8: Check the Forks for Proper Function
It’s no secret that forks have been around for a while – and there’s a good reason for that. Forks are an essential part of our dining experience, both in terms of function and form. When it comes to function, forks help us to properly divide our food so that we can more easily eat it.
They also help to prevent spills and messes, which can be particularly important when dining in formal settings. In terms of form, forks add a touch of elegance to the dining experience.
They are often used in place of knives and spoons when eating finger foods such as hors d’oeuvres, and they can also be used to decorate the table setting. Whether you’re using them for function or form, it’s clear that forks are an essential part of any proper dining experience.
Tips on Rebuilding Forks on a Dirt Bike
1. You should properly choose the Right Tools.
2. You should remove the Old Fork Seals.
3. You should properly clean the Fork Tubes.
4. You have to Install the New Fork Seals.
5. You need to fill the Fork Tubes with Fork Oil.
6. You have to reinstall the Fork Caps.
7. You should compress the Forks and Hold Them in Place.
How Do I Clean the Fork Tubes?
As anyone who has ever ridden a motorcycle knows, keeping the bike clean is essential to its performance. Not only does it help to improve visibility, but it also prevents dirt and debris from damaging sensitive components. One of the most important parts of the bike to keep clean is the fork tubes.
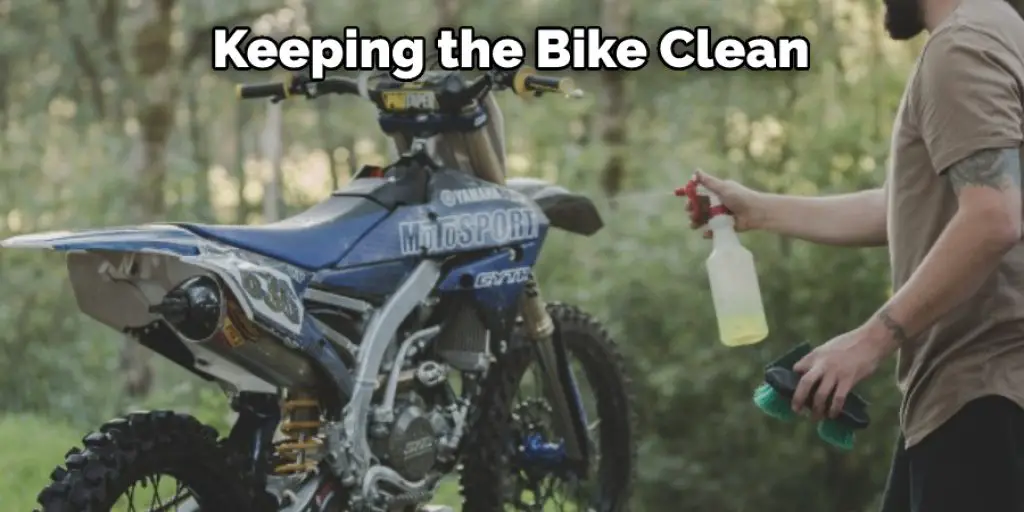
These tubes play a critical role in the suspension, and if they become clogged with dirt and grime, it can seriously affect the handling of the bike. Fortunately, cleaning fork tubes is relatively easy. The first step is to remove any mud or dirt that has built up on the outside of the tubes. Once that is done, you can use a soft brush to remove any remaining debris.
It is important to be gentle when cleaning fork tubes, as you don’t want to damage the delicate seals. Finally, use a cloth soaked in soapy water to wipe down the tubes, and then dry them off before reinstalling them on the bike. By following these simple steps, you can ensure that your fork tubes are clean and ready to provide a smooth ride.
Conclusion
By following the few steps we listed above, you can easily rebuild your forks on a dirt bike. You should determine carefully how to rebuild forks on a dirt bike. You’ll need a few tools and some patience, but it’s not a difficult process.
Plus, rebuilding your forks will help extend their lifespan and keep your ride performing at its best. So next time your forks feel soft or start leaking oil, don’t hesitate to rebuild them yourself.
Darren Matlock
Hi, I'm Darren. I love dirt bikes and everything about the off-road lifestyle. I'm passionate about motorbikes, cars, racing sports and going on adventures. If you're like me and enjoy extreme sports, you've come to the right place! I like to write articles about dirt bikes to help beginners get started. Whether you're interested in buying a dirt bike, ATV, motorcycle or want to ride for hobby, I hope my articles will inspire you to learn more about how this machine can be used to ride.