How to Make Dirt Bike Plastics Look New in 7 Steps
You have probably noticed that the plastics on your dirt bike are starting to look dull and old. So how to make dirt bike plastics look new again with the items you have available at home. This is a common problem for many bikers, and it can be frustrating to try to find ways of making them look new again.
Luckily, you can use plenty of methods that will never require any special skills or expensive supplies. In this blog post, we will talk about these methods and share some great tips for restoring your plastics in no time at all!
Required Tools & Materials
- Two buckets of warm water
- Dish soap
- Cloth or sponge
- Baking soda (or vinegar)
- Knife/scraper
- Scrub brush (for tough stains)
- A few towels or soft cloths
- An old toothbrush
- Citrus cleaner.

Instructions: How to Make Dirt Bike Plastics Look New
If you’re looking to make your dirt bike plastics look new again, what are you waiting for? These step-by-step instructions that how to clean dirt bike plastics.
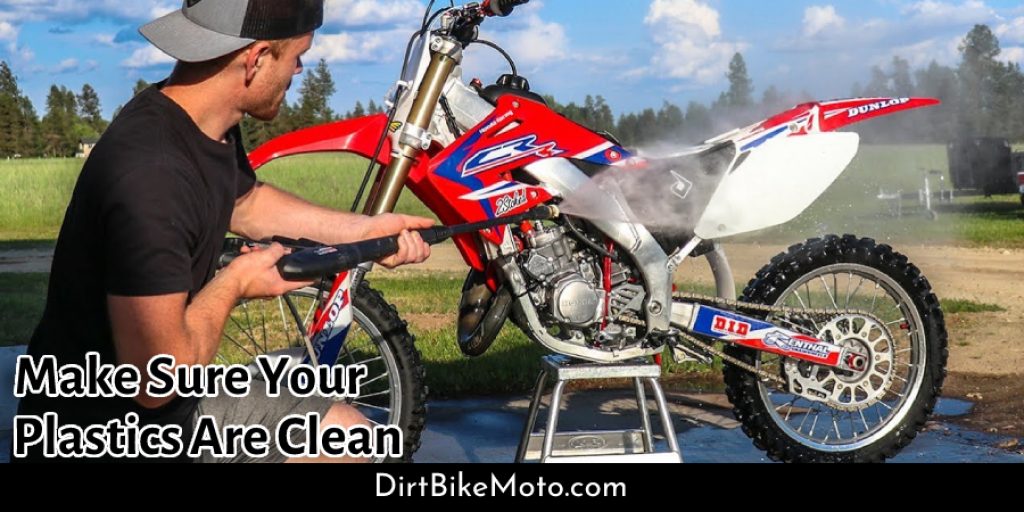
Step One: Make Sure Your Plastics Are Clean
Soak them with warm water and dish soap to remove dirt, grime, or grease from the surface. Use a scrub brush if needed (or an old toothbrush). Rinse off all soapy water with a hose or outside faucet.
Step Two: Clean The Stains Away
If any tough stains (especially grease) are left behind, try using baking soda as an abrasive to get rid of them. Scrub in circular motions until the stain has been removed. If vinegar is your preferred method, add it to your baking soda to get rid of stains.
Step Three: Remove The Rust
If rust has been the problem in getting a fresh-looking dirt bike, try using steel wool and WD40 or rubbing alcohol as a cleaning agent. Spray or apply these substances onto the surface with a rag, then scrub away for best results. If you need more help, contact a professional.
Step Four: Soak The Plastics In Water & Dish Soap
Fill both buckets with warm water and dish soap. Place your dirt bike plastics in the soapy solution, let them soak for a few minutes to loosen any gunk that might be causing an odor or unsightly stains. Rinse thoroughly after soaking.
Step Five: Dry Plastics Out
After you’ve completed the process of soaking your dirt bike plastics in dish soap, rinse them thoroughly with warm water and dry them off. You can place a fan near the items to speed up drying time or use an air compressor to blow it around if your plastic is too wet after rinsing it.
Step Six: Give Plastics A Fresh Coat Of Paint
Now that your dirt bike plastics are clean and dry give them a fresh coat of paint to freshen up the color and make it look new! You can use spray paint if you don’t want to do any painting by hand or just apply some sealant for a quick fix.
Step Seven: Enjoy Your New Dirt Bike Plastics!
Now that you’ve learned how to make dirt bike plastics look new, it’s time for the fun part! Enjoy your newly cleaned and fresh paint job on your motorcycle or ATV by riding off into the sunset.
Other Methods You Can Use
- Use a degreaser to remove any dirt or grime.
- Apply an acrylic protectant and let it air dry before use.
- Clean the surface with rubbing alcohol, then apply a polishing wax on top of the plastics after completely dried out. This will give them more hydrophobic properties that will repel water.
- If the plastics are really dirty, use a mild soap and scrub brush to remove dirt or grime. Then rinse with clean water and dry thoroughly before applying any protective coatings.
- If the plastics are scratched, use a polishing compound to remove light scratches.
- Use an automotive paint touch-up kit with the corresponding color and spray it evenly onto the area of concern. Now you have new plastic parts!
- Mix one part acrylic base coat with two parts metallic silver artist’s quality craft paint to create a metallic silver paint.
- Use a foam brush to apply the mixture over all of the plastics you want to have shiny, reflective properties. The acrylic base coat will help seal any scratches and keep your dirt bike looking good for years on end!
Things To Consider for Dirt Bike Plastic
- Clean your plastics by wiping with a cotton cloth and rubbing alcohol. Do not use soaps, solvents, or oils to clean dirt bike plastic because they can damage the surface of the material.
- Remove any stickers or labels from dirt bike plastics with as little residue left behind as possible. If there is extensive sticker debris on dirt bike plastics, remove it with a razor blade.
- Store dirt bike plastic parts in dry and cool areas, so they don’t warp or deteriorate from moisture.
- Replace any damaged or cracked dirt bike plastics as soon as possible to avoid injury while riding your motorcycle.
- Follow manufacturer’s instructions when installing new dirt bike plastic parts.
Tips & Maintenance Guide for Dirt Bike Plastics
Tip 1: Wash off all the dirt and grime on your plastics with a mild soap. Rinse thoroughly to get rid of any excess soap residue
Tip 2: Mix up some dishwasher detergent, water, and white vinegar in equal parts: Put this into an empty spray bottle.
Tip 3: Spray liberally over the bike’s plastic surfaces that are not mechanical such as around levers or fuel tank areas
Tip 4: Let sit for 15 minutes before rinsing with clear water only (no soaps) using a high-pressure hose if available
Tip 5: Drip dry out of direct sunlight – do NOT use heat! Plastic will warp and crack from intense heat sources like radiators or ovens. Air drying is best, but it can take many hours.
Tip 6: Use a microfiber cloth to polish and remove water droplets from polished plastics such as levers, mirrors, or headlight lenses.
Tip 7: Put it back together and ride! You might notice that your bike is shinier than before. This is because the dishwasher detergent lifts dirt particles off of plastic surfaces, while the vinegar helps remove grease or grime buildup on other areas of the bike.
Tip 8: For extra protection against UV rays that can cause fading over time on clear plastic surfaces like levers, use 303 Protectant for Plastics which is available in most auto parts stores. This will also help deter cracking due to heat exposure!
We hope these tips will help your next dirt bike plastics restoration project!
You Can Check It Out To Paint Dirt Bike Plastics
Precautionary Steps: How to Make Dirt Bike Plastics Look New
Safety First:
To avoid any potential harm, it’s important to have a few safety measures in place before you start. These include wearing protective gear like goggles and gloves. You also need to cover all the surfaces near where you will be working by placing newspaper down over them or using a tarp.
Use the Right Type of Soap:
It’s best to use the right type of soap for this job. The most effective cleaner is dishwashing liquid, which you can also get from your kitchen sink. Fill up two buckets with warm water and pour in some dishwashing detergent or other cleaning agents into one bucket to create a soapy mixture.
Wear Protective Gears:
To avoid any potential harm, it’s important to have a few safety measures in place before you start. These include wearing protective gear like goggles and gloves. You also need to cover all the surfaces near where you will be working by placing newspaper down over them or using a tarp.
Gather The Essential tools:
The basic set of tools you need for this job includes a bucket, sponge or scrubbing brush, soap, and paper towels/rags to dry the dirt bike plastics. You may also need some heavy-duty cleaner depending on how long it has been since they were last cleaned up.
Add The Dirt Bike Plastics:
Before you start scrubbing and cleaning, add the dirt bike plastics to soapy water. This will help loosen up any oils that have built up over time and make it easier to clean them off with just soap and water because they won’t be slippery from grease or other substances.
Scrub Away:
Now you can scrub away at the dirt bike plastics with your sponge or brush until they are thoroughly cleaned off and rinsed in clean water. Rinse them again when finished to remove any soap residue before moving on to drying the plastic parts.
Dry And Protect:
While it is not necessary to protect the dirt bike plastics from rain or anything other than time, you may want to invest in a plastic wax for longevity. Wax is not just recommended for bikes but also cars and boat exteriors as well.
You Can Check It Out Can You Put Water in a Dirt Bike Radiator
FAQs About how to restore dirt bike plastics
How Do You Restore Plastic on a Faded Dirt Bike?
A: If you have a faded dirt bike, then it is necessary to restore the plastic. This can be done by using cleaners that will remove any grease or grime from the surface of your plastics without taking off-color as well. You should clean and rinse all areas thoroughly before applying the cleaner and drying with a soft cloth such as a microfiber towel.
It is also important to use cleaners designed for dirt bikes only because generic cleaners may not be as safe if you have certain parts of your bike that contain metal components and could become corroded by the cleaner or scratched when cleaning with abrasive scrubbers. If this does happen, then there will be a need to replace those parts with new ones.
How Do I Make My Dirt Bike Plastic Shiny?
You can make your dirt bike plastics shiny by using cleaners that will remove any grease or grime from the surface of your plastics. This can be done by using cleaners that are designed for dirt bikes. If this does happen, then there will be a need to replace those parts with new ones.
Conclusion
There are many different ways on how to make dirt bike plastics look new. But what method is the best? In this article, we cover some of the most popular methods for restoring your plastic’s original shine and luster, so they don’t have to be replaced again anytime soon.
A good motorcycle detailer will work wonders on your dirt bike plastics, but you can also get the same effects by following these easy steps at home. These easy-to-follow DIY project steps will make your dirt bike look brand new without harming its integrity at all! We’ve also provided some great tips for keeping your dirt bike looking new even after months of hard riding in all types of conditions.
Follow our advice about cleaning with soap or water first before applying the right type of polish and sealant that work well for your specific model. You may be surprised how much better it looks when you take care of it! If this sounds complicated, don’t worry. We’re here to help! Just let us know in the comment below!
- How to Put a Speedometer on a Dirt Bike
- How to Find Out if a Dirt Bike Is Stolen
- How to Put Lights on a Dirt Bike Without a Battery
Darren Matlock
Hi, I'm Darren. I love dirt bikes and everything about the off-road lifestyle. I'm passionate about motorbikes, cars, racing sports and going on adventures. If you're like me and enjoy extreme sports, you've come to the right place! I like to write articles about dirt bikes to help beginners get started. Whether you're interested in buying a dirt bike, ATV, motorcycle or want to ride for hobby, I hope my articles will inspire you to learn more about how this machine can be used to ride.