
How to Adjust a Carburetor on a Dirt Bike in 7 Steps
If you are a dirt bike enthusiast, you know the importance of adequately adjusted carburetors. A carburetor that is not correctly adjusted can lead to poor performance and even engine damage. In this article, we will show you how to adjust a carburetor on a dirt bike. So that your bike performs at its best, let’s get started!

A carburetor is an essential component in a dirt bike. It is responsible for delivering the right amount of fuel and air mixture to the engine. When it is not correctly adjusted, your dirt bike will not run as well as it should. As a result, you may experience poor performance or even engine damage. Therefore, it is essential to adjust your carburetor often, especially if you are riding in different environments or conditions.
What Is a Carburetor?
A carburetor is a device that mixes fuel and air in an engine. It is used to control the speed and power of the engine.
There are different carburetors, but they all work in basically the same way. First, the fuel and air are mixed in a small chamber. This mixture is then forced into the engine.
The carburetor controls the amount of fuel that is mixed with the air. It also controls the speed at which this mixture enters the engine. This allows the engine to run smoothly and efficiently.
Required Tools and Materials
- Allen wrench set
- Screwdriver
- Carburetor adjustment screwdriver
- Pliers
- Shop rags
- Safety glasses
A Stepwise Guide on How to Adjust a Carburetor on a Dirt Bike
Here are the 7 easy steps to adjust a dirt bike carburetor perfectly like a professional.
Step 1: Identify That the Carburetor Needs Adjustment
On many dirt bikes, there will be a tiny screw on the side of the carburetor. This is known as the idle adjustment screw and is responsible for controlling how fast or slow the dirt bike engine runs when it’s idling. If your dirt bike isn’t running as smoothly as you’d like it to, or if it’s cutting out at high speeds, then it’s likely that the idle adjustment screw needs to be tweaked.

If you’re not sure whether your carburetor needs adjusting, take your dirt bike for a test ride and see if it behaves any differently than usual. If you’re still unsure, take it to a mechanic who can help you make the necessary adjustments.
Step 2: Turn the Idle Adjustment Screw
The idle adjustment screw is typically turned using an Allen wrench. However, it may be a Phillips head or flat head screw on some dirt bikes. So before you start adjusting anything, make sure you know what kind of screwdriver you’ll need.
Once you have the correct tool in hand, it’s time to adjust. The screw will be located on the side of the carburetor and will have a small hole in the center. Insert your screwdriver into the hole and turn the screw clockwise or counterclockwise to adjust the idle speed. Be careful not to turn the screw too far, as this can cause damage to the carburetor.
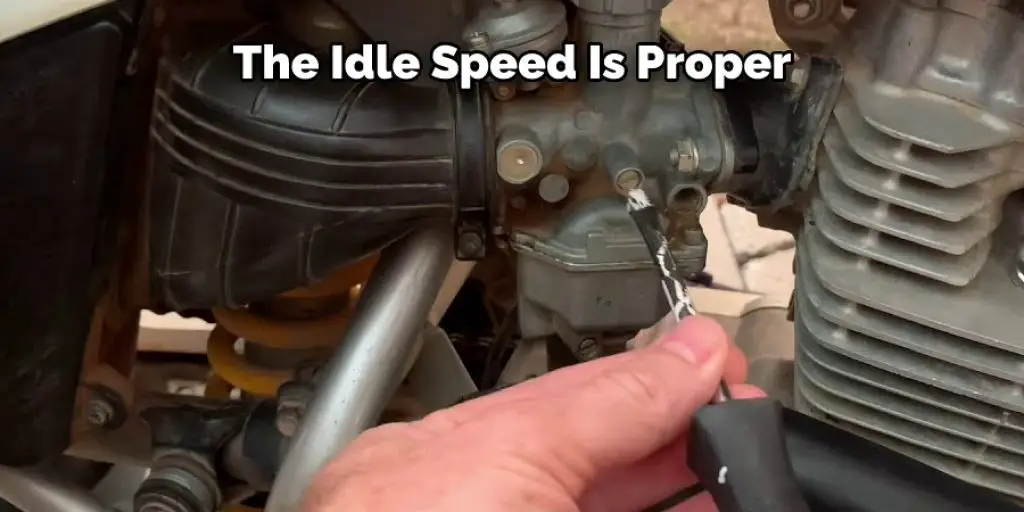
Step 3: How to Tell if the Idle Speed is Proper
There’s no one-size-fits-all answer to this question, as the ideal idle speed for a dirt bike will vary depending on the make and model. However, you can do a few things to help determine whether the idle speed is correct.
- Start the dirt bike engine and let it run for a few minutes.
- If the engine is running too fast, you’ll hear it racing or revving up. If it’s running too slow, you’ll listen to it sputtering or coughing.
- Once you’ve determined that the engine is running too fast or too slow, adjust the screw accordingly.
- Keep in mind that it may take a little while to get the idle speed just right, so don’t be discouraged if it takes a few tries.
Once you’ve got the idle speed set to your liking, give the dirt bike a test ride to see how it performs if everything seems to be running smoothly, congratulations! You’ve successfully adjusted the carburetor on your dirt bike. If not, don’t worry – try changing the screw a little more and see if that fixes the problem.
Step 4: Adjust the Main Jet on the Carburetor
The main jet on a carburetor adjusts the amount of fuel delivered to the engine. The main jet can be adjusted by turning the adjustment screw on the side of the carburetor. Turning the screw clockwise will increase the amount of fuel delivered to the engine, and turning it counterclockwise will reduce the amount of fuel delivered to the engine. Make minor adjustments to the main jet, as making significant adjustments can affect how well the carburetor functions.
Once you have made your adjustment, start up the dirt bike and test it out. Ride around for a while and make further adjustments as needed. Remember that it may take some time to get the main jet set right, so don’t be discouraged if it takes a few tries. With a bit of patience and some trial and error, you should be able to get the carburetor adjusted just the way you want it.
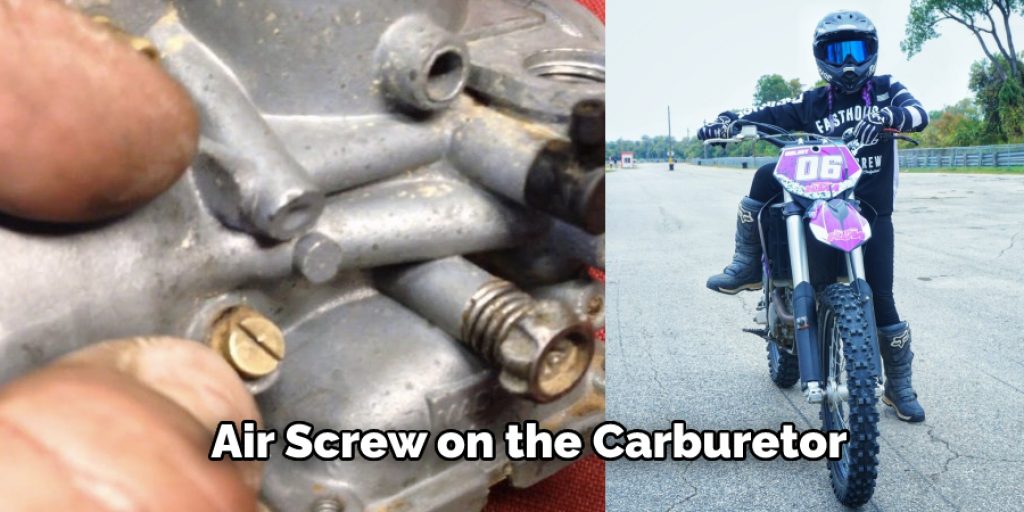
Step 5: Adjust the Air Screw on the Carburetor
A dirt bike’s air screw affects the fuel mixture by adjusting how much air can mix with the fuel. Turning the air screw clockwise will add more fuel and make the bike run richer. Turning it counter-clockwise will add less fuel and make the bike run leaner.
To adjust the air screw, first find it on the carburetor. It will be a small, knurled knob located near the air filter. With the bike’s engine off, unscrew the air screw until it comes loose from the carburetor. Then, turn it 1/4, turn clockwise, and re-tighten it. Start the engine and check to see if it runs better. Repeat this process as necessary until the engine runs smoothly. Be careful not to over-tighten the air screw, as it can strip the threads and make it difficult to adjust later.
Step 6: Test Your Adjustments for Proper Operation
Once you have made all of your adjustments, it’s essential to test them out to ensure they are working correctly. Next, take the dirt bike for a ride and pay close attention to its performance; if everything seems to be running smoothly, congratulations! You’ve successfully tuned your carburetor. If not, don’t worry – make further adjustments as needed until the bike runs appropriately.
Remember that it may take some time to get the carburetor adjusted just right, so be patient and keep trying until you get it right. With a bit of practice, you’ll be able to fine-tune your dirt bike’s carburetor like a pro.
Carburetor Maintenance Tips
A carburetor is a device that mixes fuel and air in the correct proportions for an engine to burn. Properly adjusting the carburetor is crucial for performance and reliability when it comes to dirt bikes. Here are some tips on maintaining your carburetor:
Engine Condition:
Before making any adjustments to the carburetor, it’s essential to check the engine condition. Ensure the air filter is clean and that there’s no build-up of dirt or debris in the carburetor.
Throttle Position:
The throttle position is also essential to consider when adjusting the carburetor. The throttle position should be about 1/3 open when the bike is idling. If it’s not, you may need to adjust the idle screw on the carburetor.
Cleaning the Carburetor:
Occasionally, you may need to clean the carburetor. This can be done by spraying a carburetor cleaner into the air intake and letting it sit for a few minutes. Then, use a brush to scrub the inside of the carburetor. Be sure to rinse it off with water when you’re finished.
Selecting The Right Size Carburetor:
If your dirt bike is having performance issues, you may need to change the size of the carburetor. You can purchase a different size carburetor or by adjusting the jets on the existing carburetor.
Understanding Initial Ignition Timing:
To properly adjust the carburetor, you’ll need to understand the initial ignition timing. This is when the spark plugs fire and ignites the fuel/air mixture in the engine. You can find initial ignition timing on the spec sheet for your dirt bike.
The Fuel Pressure:
Another factor you’ll need to consider when adjusting the carburetor is the fuel pressure. This can be found on the spec sheet for your bike. You may need to change the fuel pressure if you’re using a different type of fuel than what was recommended by the manufacturer.
Float Level:
The float level is the last thing you’ll need to adjust for the carburetor. You can find the float level on the spec sheet for your bike. If the float level is incorrect, you may need to adjust the height of the float or the position of the float valve.
Check for Leaks:
Once you’ve made all the necessary adjustments to the carburetor, it’s essential to check for leaks. Leaks can be caused by several things, such as a faulty gasket or a cracked carburetor body.
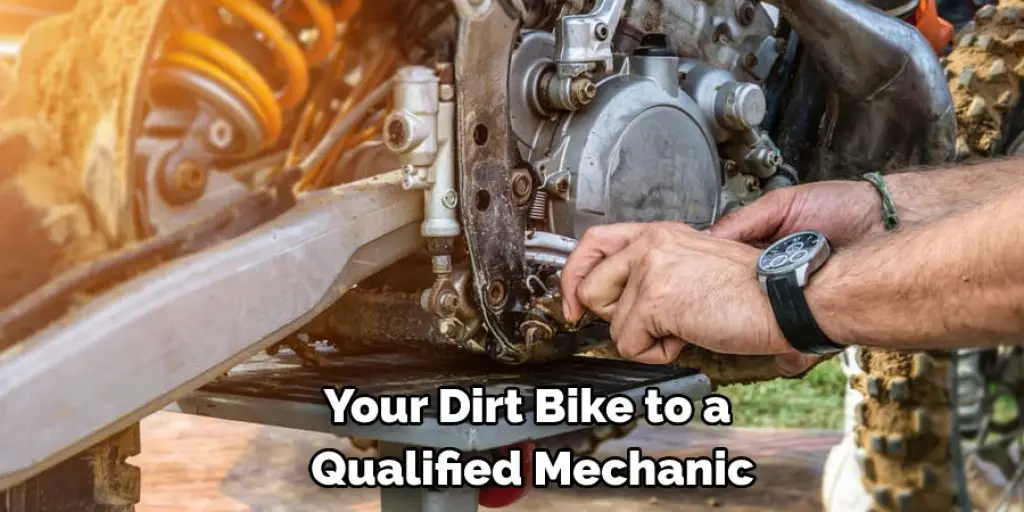
Once you have a basic understanding of how to adjust a carburetor on a dirt bike, it’s essential to take your bike to a qualified mechanic if you’re not comfortable doing it yourself. Improper adjustment can lead to decreased performance and even damage to the engine. If you decide to adjust the carburetor yourself, be sure to follow the specific instructions for your bike model.
How do you adjust the air mixture in a carburetor?
To adjust the air mixture in a carburetor, you will need a flathead screwdriver.
- Locate the air mixture screws on the carburetor. There are usually two screws, one on each side of the carburetor.
- Start by turning both screws in until they are snug.
- Then, turn both screws out 1.5 turns.
- Start the engine and let it warm up to operating temperature.
- Use the screwdriver to turn one of the air mixture screws in 1/4 turn at a time. Listen to the engine as you make the adjustment. The goal is to find the setting where the engine runs smoothest and idles at its highest speed.
- Once you have found the best setting for one screw, repeat the process for the other screw.
- Once you are satisfied with the engine’s idle speed and smoothness, turn both air mixture screws in 1/4 turn to fine-tune the adjustment.
- Test drive the vehicle to make sure that the air mixture adjustment is correct.
If the engine is running too rich, it will idle rough and produce black smoke from the exhaust. If the engine is running too lean, it will idle erratically and may stall.
Conclusion
Now that you know how to adjust a carburetor on a dirt bike, it’s time to put this knowledge into practice. Be sure to follow the steps outlined in this article carefully, and you should be able to get your bike running like new in no time at all. Happy riding!
You can check it out to Clean Aluminum Dirt Bike Frame
Darren Matlock
Hi, I'm Darren. I love dirt bikes and everything about the off-road lifestyle. I'm passionate about motorbikes, cars, racing sports and going on adventures. If you're like me and enjoy extreme sports, you've come to the right place! I like to write articles about dirt bikes to help beginners get started. Whether you're interested in buying a dirt bike, ATV, motorcycle or want to ride for hobby, I hope my articles will inspire you to learn more about how this machine can be used to ride.

