
How to True a Dirt Bike Rim
The dirt bike rim is the metal ring that attaches to your dirtbike’s tire and wheel. The dirt bike rim holds your tire in place so you can ride on it. Just like any other part of your dirtbike, the edge needs to be taken care of and true regularly. In this guide, we will give you some step-by-step instructions on how to true a dirt bike rim and also to share some advice to maintain your dirtbike rim.
Tool You’ll Need
- Tire Lifter
- Hammer
- Tool Box Wrench
- Slotted Head Screwdriver
- Socket Set
- Impact Gun with Socket Adapter Kit
- Tire iron
- Lubricant (dirt bike rim grease)
- Ruler or straight edge
- Pencil
Instructions: How to True a Dirt Bike Rim
Step One: Make Sure You Have the Right Tools and Supplies
The tools you will need to true your dirtbike rim are a tire lifter, hammer, toolbox wrench, slotted head screwdriver or flathead screwdriver (depending on what type of bolts your bike has), socket set with combination wrenches in metric sizes from 13mm to 22mm, an impact gun with socket adapter kit and a tire iron. You should also have some lubricant which is most commonly known as dirt bike rim grease or wheel bearing dust, such as WD-40.
Step Two: Locate Your Dirtbike Rim’s Damage
If you are preparing for the next race season, make sure that your wheels are in good condition by inspecting them regularly so that they do not develop any damage from wear and tear during off-seasons.

The first thing you will want to look at if there is any visible damage on your dirtbike rim is where it would be located, how deep the dents go into the metal of the rim, and what shape they take (if possible). This can help determine what the best way to true the rim is and how much work needs to be done.
Step Three: Find Your Rim’s Center Line
The centerline of a dirtbike rim will always run perpendicular to the area where the tire sits on it, which can usually be seen in an indentation or nailhead marking near one side of it. You should try your best to get this as close as possible before trying any other methods because if you do not have it lined up correctly, then all subsequent steps will be off too!
This is important for getting rotations right later on when we talk about them more thoroughly, so make sure that once you find a nailhead mark or dent in your wheel that has already landed at its starting point, you use a marker or chalk mark the centerline.
Step Four: Mark Your Rim’s Center Line
Once you have found where your centerline is, make sure that it is marked on both sides of the wheel as this can help ensure accuracy later down the road if any adjustments are needed during trueing by making certain you know which side needs to stay centered at all times.
You just need to take some time in finding where there is an indentation (on most dirt bike rims) so then you can know which side of the wheel needs to stay centered for us moving forward in correcting any imbalances later down the road.
Make sure, though that when marking your new centerline that you do not go over the top of your old one as doing so may leave a mark on your rim and will be less beneficial to us in the end.
Step Five: Grab Your Tools
You should now grab some tools for truing because there may need to be some work done with them when we go through these following steps while maintaining our dirt bike rims too!
For those who do not want or cannot purchase tools, they can use what they find around their garages, such as old bolts, pliers, vice grips, and more, so take a look around and figure out what you can use.
Step Six: Get the Rim Straight
Now, take your tire off of the rim if it is still on there to get it straightened up, and then put it back on after we have tried our dirt bike rims. It should be easy to find where this needs to happen by looking at just one side of the wheel as they will not match up.
Make sure that when you are using a vice grip or another tool like pliers, make sure that you do not send anything else but only work with the spokes because bending other parts such as brake pads can damage them, which might lead us to need new ones later down the road!
Step Seven: Use some lubricant to tighten the rim
Once you have the rim straightened up, it is time to tighten everything back down. Make sure that after this process, we need to use some lubricant on our dirt bike rims so they do not become too dry and start wearing out more quickly than usual. A good idea might be to put a little bit of oil on them once in a while or even some kind of grease for extra protection, which you can pick up at your local hardware store!
Step Eight: Put everything back on.
Once you are done with all the steps, put everything back together as best you can to avoid any problems before riding your dirt bike again! This includes getting our tires back on properly so that they will stay inflated for a longer period of time and also make sure all parts are secured firmly in place before starting up or moving forward.
Step Nine: Check for any loose parts.
A final step not to forget is checking over the bike one last time before riding it in order to make sure nothing has come off or been loosened during your repairs. Make sure all bolts are tightened up, and if you find anything, tighten it back down with a wrench. This will help to make sure that all parts are secure and not going to come loose while riding your dirtbike.
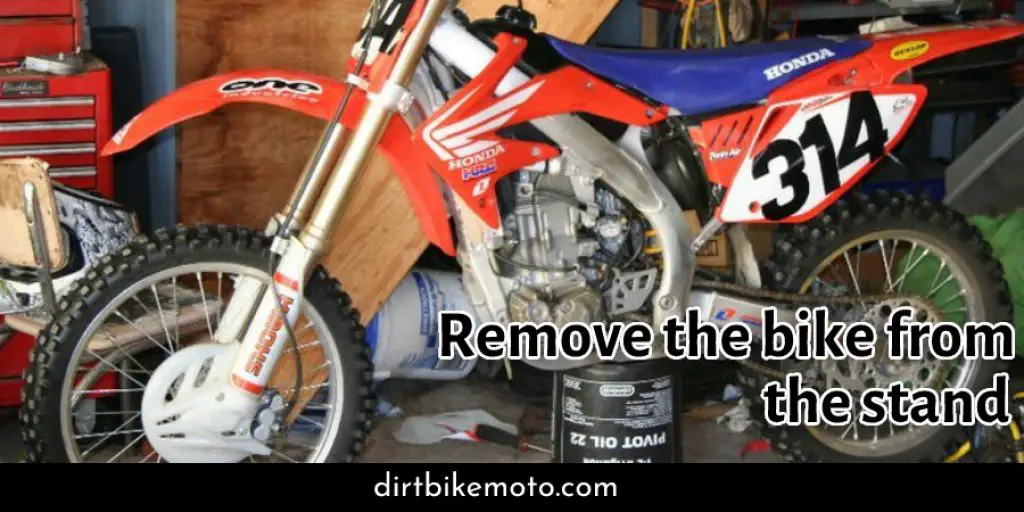
Step Ten: Remove the bike from the stand
Once you have finished checking over every inch of your dirt bike, it is time to remove it from its stand so that you can get on with riding! Slowly take off any ties or straps and make sure the bike is in a good and sturdy position before getting on it.
Note: It’s essential for those who want their wheels to last long to keep them in good shape, so it is important for you to do this and true your rim now!
Things To Consider Before Disassembling Your Rim
- Disassembling your dirt bike rim is not easy to do, and it requires a wrench. You will need some time, patience, and the proper tools in order to take apart your dirtbike rim without breaking or scratching anything. If you have any doubts about doing this yourself, we recommend bringing it to a mechanic for them to make sure that it is done right.
- Be sure to check the outside of your rim for any rust or corrosion around the surface and use a wire brush (if necessary) to remove it before continuing with disassembly. This will help avoid damaging your dirtbike rim during assembly, leading to problems down the road like lost air pressure in tires, etc.
- You will need to remove the dirtbike rim from your bike. This is a two-person job, so find an extra hand! Place one foot on the outer part of the tire and use that to pull up while you rotate it for it to pop off easily. Be sure not to hit or scratch anything as you do this.
- Check the inside of your rim and ensure that all spacers, bearings, etc., are still in place before disassembling them any further.
- Remove both inner tubes from the tire by pulling up on it until you can pull out one side completely with ease. To remove the other line, use a flat head screwdriver for popping the side out.
- Cut your tire off of either end with a knife, taking care to avoid ripping it as you work around the edges. This will protect from dirt entering the tire and will also allow you to see damage better if there is any.
Some Tips To Maintain Your Dirt Bike Rim
Tip-1: Make sure to check up on your bike periodically, especially if it is a used one.
Tip-2: Keep an eye out for any signs of wear and tear. This includes scratches in the paint or rust that has formed around parts like bolts and nuts.
Tip-3: Ensure your tires are at the right pressure to avoid them from going flat. If they do, then you’ll have a much more difficult time trying to true your rim and also need to replace it even sooner!
Tip-4: Avoid using too little or too much air in your tires as this will cause wear and tear faster than desired.
Tip-5: If you notice that your bike seems humming or shaking, then it is a sign that the spokes need to be tightened. Please do not ignore this, as pulling them will help avoid more extensive problems like cracks in the rim!
Tip-6: Keep an eye on whether there are any loose nuts and bolts on your dirtbike so they can be tightened or replaced before anything happens to them.
Tip-7: Carry your toolkit at all times in case of a breakdown, and you’ll be able to fix it without having any issues!
Frequently Asked Questions
How to Position the Rim Properly?
One of the most important things to do with your dirt bike wheel is positioning it up in a way that allows you to see what you are doing. If this means laying on the ground, so be it, but make sure the bottom side of the rim is facing away from the sun or any other light source. The best thing for your hands would probably be some vice grip pliers that will prevent damage to both your fingers and the tire itself if they slip during manipulation.
How often should I true my dirt bike wheel?
True your dirt bike wheel when you notice the rim is not circular. If it’s just a few spokes out of alignment, correct them with an Allen wrench while turning the tire by hand and then try to true again. However, if there are more than ten loose or bent spokes, replace new ones before attempting to true once more.
How to Tighten or Loosen a Spoke?
To tighten, loosen the opposite spoke until it is snug and then check if there’s any play in the rim by gently pushing on it with your hand. If so, adjust as needed. When finished tightening all spokes evenly (one at a time), use two hands to turn over the wheel while holding onto an end of one side of the axle – this will help you align and tensions spokes correctly across both sides of each other simultaneously. Then, turn back around 180 degrees, checking that they are still tight before releasing your grip on them.
Conclusion
When your dirt bike rim is out of true, it can be a significant problem. Fortunately for you, we’re here to help! In this blog post, we’ll show you how to true a dirt bike rim so that it won’t hinder your riding experience and create problems between rides. So follow our step-by-step instructions carefully and enjoy the smooth ride on the way back down from the mountain top!
You may read also –
Darren Matlock
Hi, I'm Darren. I love dirt bikes and everything about the off-road lifestyle. I'm passionate about motorbikes, cars, racing sports and going on adventures. If you're like me and enjoy extreme sports, you've come to the right place! I like to write articles about dirt bikes to help beginners get started. Whether you're interested in buying a dirt bike, ATV, motorcycle or want to ride for hobby, I hope my articles will inspire you to learn more about how this machine can be used to ride.


