How to Straighten Dirt Bike Radiator
Adding some dirt bike radiator straightening to your toolbox can save you time and money. If you ride a dirt bike, then you know that radiator maintenance is important. Keeping your dirt bike’s radiator clean and clear of debris is crucial for keeping your engine running cool and ensuring that your bike performs at its best.
When your dirt bike radiator is crooked, it can cause poor cooling performance and overheat. It is important to know how to straighten dirt bike radiator. While not a difficult task, it can be frustrating if you don’t know how to do it correctly. In this article, we will show you how to straighten a dirt bike radiator quickly and easily. Let’s get started!
Materials You Will Need
- Flathead screwdriver
- Phillips head screwdriver
- Ruler or measuring tape
- Pencil
- Marker
- Soft cloth
- Duct tape
- Hammer
Importance of Straightening Dirt Bike Radiator
1. Helps to Prevent Engine Overheating
One of the most important reasons to straighten your dirt bike radiator is to help prevent engine overheating. When your radiator is bent, it can cause coolant to flow less efficiently and this can lead to your engine overheating. Engine overheating can cause a variety of problems, including decreased performance, reduced fuel economy, and even engine damage.
2. Helps to Improve Cooling Efficiency
Another reason to straighten your dirt bike radiator is to help improve cooling efficiency. When your radiator is bent, it can block the flow of air and this can lead to your engine running hotter than it should. By straightening your radiator, you can help to improve cooling efficiency and keep your engine running at its optimal temperature.
3. Helps to Prevent Coolant Leaks
Another reason to straighten your dirt bike radiator is to help prevent coolant leaks. When your radiator is bent, it can cause coolant hoses to rub against each other and this can eventually lead to a leak. Coolant leaks can be very damaging to your engine and can even lead to engine failure.
4. Helps to Improve Airflow
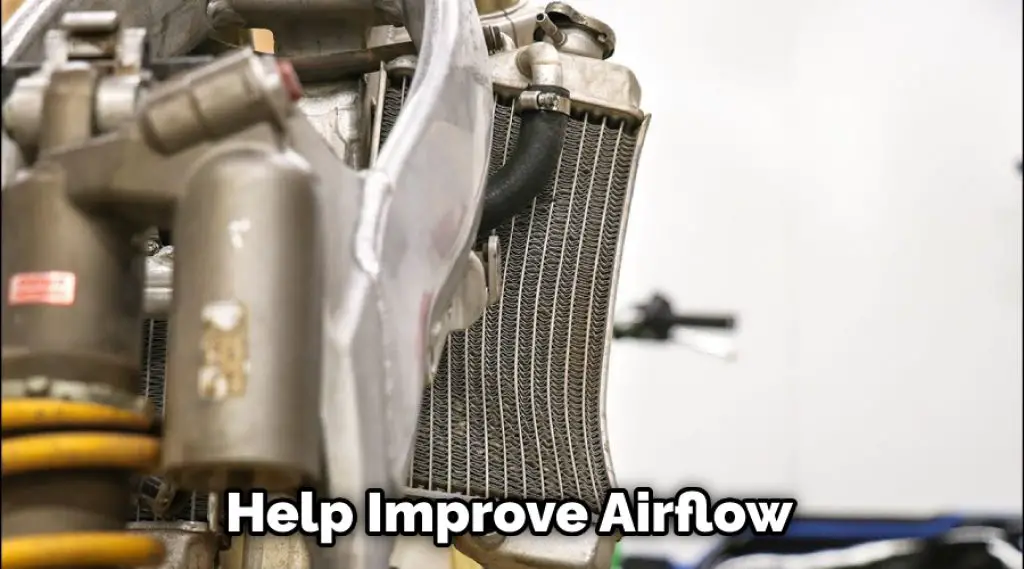
Another reason to straighten your dirt bike radiator is to help improve airflow. When your radiator is bent, it can block the flow of air and this can lead to your engine running hotter than it should. By straightening your radiator, you can help to improve airflow and keep your engine running at its optimal temperature.
5. Helps to Reduce Noise
Another reason to straighten your dirt bike radiator is to help reduce noise. When your radiator is bent, it can cause coolant hoses to rub against each other and this can eventually lead to a leak. Coolant leaks can be very noisy and can be quite annoying for you and those around you.
7 Steps Guide on How to Straighten Dirt Bike Radiator
Step 1: Remove the Radiator Cap and Drain the Coolant Into a Container
As any dirt bike owner knows, maintaining the radiator is essential for keeping the engine running smoothly. One of the most important steps in radiator maintenance is draining the coolant and replacing it with fresh fluid.
The coolant system should be drained every few months to remove debris and prevent corrosion. To drain the coolant, remove the radiator cap and place a container beneath the radiator drain valve.
Open the valve and allow the coolant to flow into the container. Once the radiator is empty, close the valve and replace the cap. You can now dispose of the old coolant and fill the radiator with fresh fluid.
Step 2: Remove the Radiator Hose From the Inlet and Outlet
Before starting any work on the bike’s engine, it is important to remove the radiator hose from the inlet and outlet. This will prevent any coolant from leaking out while the engine is being worked on.
To remove the radiator hose, first, locate the inlet and outlet. The inlet is usually located at the top of the radiator, while the outlet is usually located at the bottom. Once you have located the inlet and outlet, use a pair of pliers to grip the hose and twist it counterclockwise until it comes loose. Once the radiator hose has been removed, you can proceed with working on the engine.
Step 3: Remove the Bolts That Hold the Radiator in Place
Before you can remove the radiator, you need to remove the bolts that hold it in place. There are usually two bolts, one on each side. Use a wrench to remove the bolts. Once the bolts are removed, you can pull the radiator out.
Be careful not to damage the fins on the radiator. The fins help to dissipate heat and keep the engine cool. Once the radiator is removed, you can replace it with a new one. Make sure to use new bolts to secure the radiator in place.
With the new radiator in place, your dirt bike will be able to stay cool, even on the hottest days. Thanks for reading! I hope this helps.
Step 4: Carefully Remove the Radiator From the Bike
While it may seem like a daunting task, removing the radiator from your bike is relatively simple and only requires a few tools. You’ll need to remove the seat so that you have easy access to the engine.
Locate the two bolts that secure the radiator in place and remove them using a wrench. Carefully pull the radiator away from the bike, taking care not to damage any of the surrounding components. With a little patience and care, you’ll have the radiator off in no time.
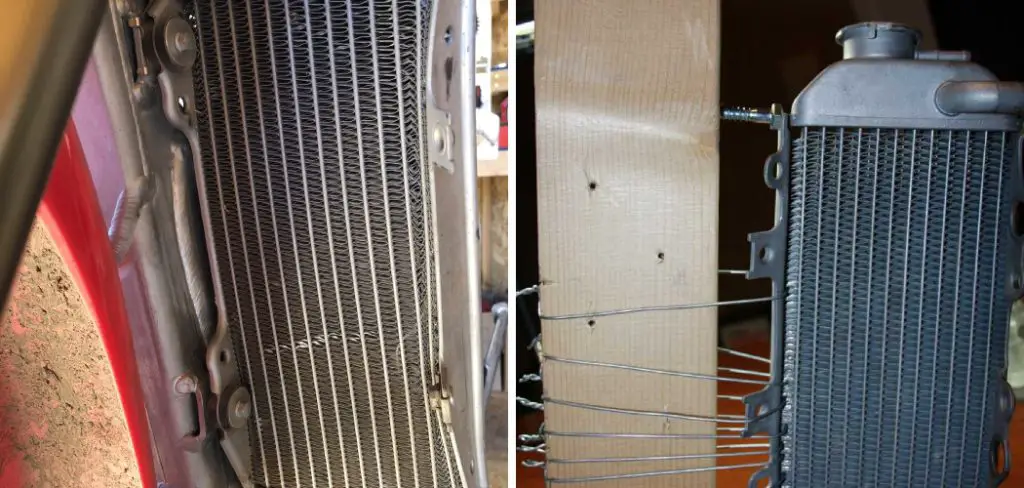
Step 5: Inspect the Radiator for Any Damage

The radiator is one of the most important parts of your bike’s cooling system, and it’s important to inspect it regularly for any damage. Look for any cracks or leaks in the radiator itself, as well as any hoses that may be connected to it. If you see any damage, it’s important to have it repaired as soon as possible.
A leaking radiator can cause your engine to overheat, and a cracked radiator can lead to complete engine failure. In addition, check the coolant level in the radiator regularly. If it’s low, add more coolant until it reaches the full line.
By regularly inspecting your radiator, you can keep your dirt bike running smoothly and avoid costly repairs down the road.
Step 6: Measure the Width of the Radiator
To ensure your radiator will fit properly in your home, it is important to measure the width before making a purchase. With a tape measure, measure the distance from one edge of the radiator to the other at the widest point.
Write down this measurement so you can reference it when shopping for a radiator. Keep in mind that some radiators are designed to be installed flush against a wall, while others may protrude slightly.
Make sure to take this into account when measuring the width of your space. With accurate measurements, you can be confident that you will find a radiator that fits perfectly in your home.
Step 7: Mark the Width of the Radiator on a Piece of Paper
Most people don’t think about how wide their radiator is until they go to purchase a new one. Even then, unless you are replacing your radiator with a replica, you may be surprised by how much space it takes up.
To ensure that you buy a radiator that will fit in the space you have available, it is important to measure the width of your current radiator. The best way to do this is to mark the width of the radiator on a piece of paper.
When you are shopping for a new radiator, you can easily compare the measurements to see if it will fit in the space you have available. Taking just a few minutes to measure your radiator can save you a lot of time and hassle in the long run.
And that’s it! You have now successfully straightened your dirt bike radiator. By following these simple steps, you can help to improve the performance of your bike and prevent engine overheating. Thanks for reading and we hope this article was helpful.
You Can Check It Out Test a Cdi Box on a Dirt Bike
Tips on Straighten Dirt Bike Radiator

- You should properly check the coolant level.
- You should remove the Radiator Cap.
- Regularly inspect the Radiator for Damage.
- You should also inspect the Radiator Hoses.
- You should check for Leaks.
- Properly tighten Any Loose Hoses or Clamps.
- You should refill the Radiator with Coolant.
- You should start the Bike and Let It Idle.
- You have to take The Bike For A Test Ride.

Conclusion
While the process of straightening a radiator may seem daunting, it is quite simple if you have the right tools. You should determine carefully how to straighten dirt bike radiator.
With a few basic household items, you can get your dirt bike back on track in no time! We hope this guide has been helpful and that you will be able to fix your problem with ease. As always, feel free to contact us if you have any questions or need further assistance.
Darren Matlock
Hi, I'm Darren. I love dirt bikes and everything about the off-road lifestyle. I'm passionate about motorbikes, cars, racing sports and going on adventures. If you're like me and enjoy extreme sports, you've come to the right place! I like to write articles about dirt bikes to help beginners get started. Whether you're interested in buying a dirt bike, ATV, motorcycle or want to ride for hobby, I hope my articles will inspire you to learn more about how this machine can be used to ride.