How to Put a Chain on a Dirt Bike
Chains are a necessary part of dirt bike maintenance, and luckily they’re easy to replace. But How to put a chain on a dirt bike? In this guide, we will try to cover the answer in a simple way as possible. Read below for the step-by-step instructions, and also, you will find some advice and maintenance tips along the way.

When To Replace A Dirt Bike Chain
It is best to replace your dirt bike chain at least every other year. The reason for this replacement is, as chains wear out, the pins inside of them can come loose and get caught between moving parts. This causes a lot more friction that wears down the engine, in addition to wearing out your chain faster than normal.
Types of Dirt Bike Chains
Standard Chain:
The Standard Chain is a more durable chain, which makes it better for people who have to ride in tough conditions. The dirt may get inside the links, but they will not stop or jam easily because of metal pins that are put on each side of the link design.
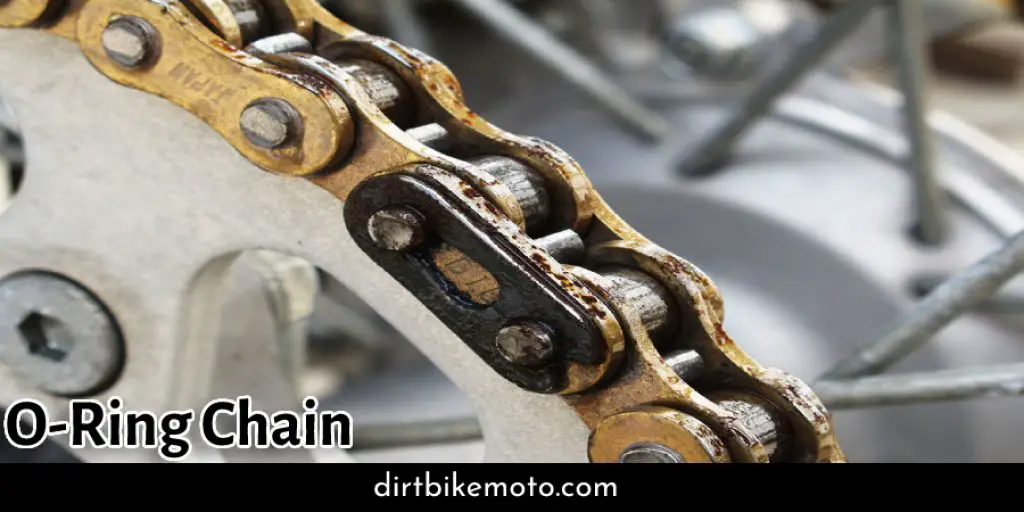
O-Ring Chain
The O-Ring Chain is a lighter and cleaner chain, which makes it easier to ride on. In addition, it does not require as much attention because the dirt cannot get inside of the links and cause a jamming or stopping problem. The downside of an O-ring chain is that they are not as durable, so you will need more than one over your bike’s lifetime.
X-ring chain:
The X-ring chains are a more durable chain, which makes them better for people who have to ride in tough conditions. The dirt may get inside the links, but they will not stop or jam easily because of metal pins that are put on each side of the link design.
Y-ring chain:
The Y-ring chains are also heavy-duty and durable, and they use one less link in the chain than other designs, which is a great benefit for off-road bikes. This design does have an issue with dirt getting inside of them, but it will not stop or jam easily because of metal pins that are put on each side of the link design.
Tools Needed
- A new chain
- Chain tool (or other tools as needed)
- Lubrication for the chain and all moving parts
- A new O-ring
- Grease (optional, but recommended)
- Pliers for removing the old chain
- A hammer for bending pins back into place.
Instructions: How to Put a Chain on a Dirt Bike
Step One:
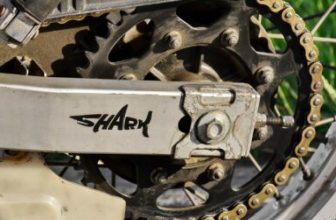
Remove the old chain by loosening one or more side plates with a wrench. The wrench should be of the same size as the nuts on your bike’s drive sprocket. Remember to remove all excess guide pins and ensure that you’re removing both sides simultaneously, without turning them in opposite directions.
Step Two:
Carefully remove the chain from your bike and inspect it. If you see any problems with the pins, replace them immediately; if a link is damaged or has lost its rivet, then that’s also reason enough to get a new one. Once you’ve found new parts for every problem area, re-attach the links of the chain.
Step Three:
Use a lubricant to ensure that the surface of the new chain is coated in oil. You don’t need to put too much on, just enough for it to be spread across one side and then wiped off with another rag or paper towel. This will protect your bike from unnecessary wear and tear when you’re riding.
Step Four:
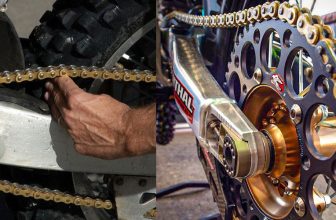
Place the chain onto the bike and turn it so that you can see both ends of it, as well as where they’ll be attached to your derailleur’s big and small sprockets, respectively. Now use a pair of pliers or a vice grip to twist on two links at once until the pins on each side of the chain are lined up with their corresponding holes on your bike’s sprockets.
Step Five:
Use a lockring tool to tighten down the two links that you just connected and then turn it in an anti-clockwise direction until there is no more slack left in either section of the chain or all those links have been connected.
Step Six:
Take a quick glance at your sprockets to make sure that the chain is fully wrapped around them, and then use an adjustable wrench or pliers to tighten up the lockring tool until there’s no slacker in it. but be careful not to over-tighten it, as this might damage your lockring.
Step Seven:
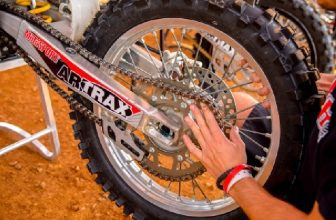
Once you’re done, use your fingers to give the chain a quick inspection for any tight links or loose ones. If there are some of either, go back and twist them together again until they feel just as snug as every other link on the chain.
It’s important that all sections of this yard-long metal loop be as tight as they can be because slackness in one part of the chain will cause a corresponding lack of tension in another.
Step Eight:
Once you’re confident that your chain looks just right and is as taut as it ought to be, go ahead and give it a few more rotations before finally tightening up the lockring tool with a wrench.
Step Nine:
Now that the chain is all nice and tightened up, you can go ahead and install your drive sprocket back onto your dirt bike by lining it up in a place with the nose of one side of the rear tire before inserting two bolts into its mounting holes. If there are any worn-out sections, those will be the parts where you’ll need to cut out a portion of the chain and replace it with a new one.
Step Ten:
Make sure that your drive sprocket is secured in place, reattach your exhaust system and then go ahead and take her for a spin!
Things To Consider Before Putting a Dirt Bike Chain
- Make sure the chain is long enough. Determine how much you need by measuring from where it attaches to your bike’s rear axle (or sprocket) and over to the front wheel.
- Get a new chain that matches your old one: width, pitch, number of plates, type (non-o-ring or o-ring). You don’t want to put an old chain on new sprockets, or vice versa.
- Keep the chains tight by using a motorcycle-specific tool and tightening up both sides of each link until the slack is gone.
- Check your teeth for wear. If they’re rounded off from use, you’ll need to replace them with new ones.
- Keep your bike clean and well lubricated so that dirt doesn’t get in the way of a smooth operation.
Maintaining Tips for Your Dirt Bike Chain
One of the most important parts of any dirt bike is your chain. Your chain must be well lubricated and kept clean for it to remain durable, efficient, and safe! Here are some tips on how to properly maintain your dirt bike’s chain:
- Clean off all mud from your chains with a rag after every ride or rainstorm.
- Make sure to use a chain lube that is safe for the environment and your dirt bike (many lubricants contain solvents like petroleum, which can damage seals).
- Clean off excess mud or debris from both ends of the links with an old toothbrush. To remove stubborn grit, try using WD40 on a rag to wipe the chain clean.
- Make sure that your bike’s derailleur and sprockets are adjusted properly because a misaligned or dirty drivetrain can cause efficiency issues with your dirt bike.
- Get your chain replaced if it has more than a couple thousand miles on it or is badly rusted.
- Adjust your chains regularly (every three months) at a local shop for best results!
Precautions Before Replacing Dirt Bike Chain
There are some precautions that should be taken when replacing your dirt bike’s chain. We have mentioned them below:
- Be sure that the chain is not overstretched, as this will cause it to break during installation.
- Always use a clean rag or towel to wipe off any dirt and debris from both sides of the old chain before installing a new one. This prevents particles from entering the system, which can lead to premature wear on other parts, such as the sprockets.
- Take care not to pinch your fingers or any other body part when pulling the old chain up and over the rim of the bicycle’s large sprocket.
- Do not use a screwdriver, hammer, pliers, wrench, or another tool to tighten the new chain. Doing so can damage both chains as well as all moving parts.
- When installing a new chain, be sure to use the correct size. Excessively long chains can cause interference with other parts of the dirt bike and prevent proper installation.
- Make sure to wear gloves or use a rag when handling the old chain so that you won’t get dirt and debris on your hands, which can then be transferred to other parts of the bike during installation.
Frequently Asked Question
How Tight Should a Dirt Bike Chain Be?
The chain should be tight enough to not slip off the sprocket. If you are using a metric ruler, this is when it fits between 0.25 and .50 centimeters from the teeth of the sprockets
How Often Should I Check My Chain?
You should check your bike’s chains before each ride and after each ride. Some people will say that chains should be checked before every ride, but this is not necessary if the conditions are consistent and you inspect your chain for wear periodically. A dirty or dry chain can cause more friction against the sprockets than a clean and lubricated one would. This causes undue wear on both parts at a faster rate.
How to Shorten the Dirt Bike Chain?
A: If you need to shorten the chain, use a measuring tape or ruler and mark how much of an inch needs to be cut off. Be sure that when marking one side, there is equal room on the opposite side so that it does not affect your sprockets. You may also want to measure around the bike’s frameset for the exact length you need.
Wear leather gloves while cutting your old chain with a saw, as this will help prevent accidents from occurring, like in the case of metal shavings going into your hand, which can cause serious health problems if left untreated.
How do I Clean my Chain?
To keep things simple, apply some degreaser down every link until all of the gunk is removed. You can also use a degreaser on just one side of your chain and then quickly brush it off with an old toothbrush or similar cleaning device to help you clean out all of those hard-to-reach places in between each link.
How do I Lubricate my Chain?
Apply some lubricant down every inch of the links until they are completely coated. Again, make sure that you apply enough so that there will be no crevices left uncoated but not too much where it would drip everywhere else, like on your frame or sprockets, for example.
Which Type of Chain Are Mostly Used in Dirt Bike?
O-rings are the most common type of chain used on dirt bikes. The rings move freely against one another, so they wear down slowly and can be adjusted for tension without needing to remove the chain. O-rings chains are also consistent in size, which makes them easy to replace with a new or old one if necessary.
Conclusion
Now that you know how to put a chain on a dirt bike go out and conquer the trails. We hope this guide has helped you understand at least one more part of biking so you can enjoy it even more!
Whether or not we’ve been able to answer any questions for you about chains and their use, as well as some other common aspects of riding, feel free to contact us anytime with additional inquiries. We’re happy to help in any way possible.
You may read also:
Darren Matlock
Hi, I'm Darren. I love dirt bikes and everything about the off-road lifestyle. I'm passionate about motorbikes, cars, racing sports and going on adventures. If you're like me and enjoy extreme sports, you've come to the right place! I like to write articles about dirt bikes to help beginners get started. Whether you're interested in buying a dirt bike, ATV, motorcycle or want to ride for hobby, I hope my articles will inspire you to learn more about how this machine can be used to ride.