How to Jet a Dirt Bike Carburetor in 9 Steps
If you’re like most dirt bike riders, then you know that the carburetor is a critical component of your machine. A jetted carburetor can make all the difference in how your bike runs and learning how to jet it properly is essential for getting the most performance out of your bike. In this article, we’ll teach you how to jet a dirt bike carburetor and explain why it’s so important. We’ll also provide some tips for getting it set up just right. So read on to learn more!

What Causes a Carburetor to Need Rejetting?
There are a few different factors that can cause a carburetor to need rejetting. The most common is simply an elevation change. If you ride at high altitudes, the air is thinner and contains less oxygen. Your engine will run leaner, and you’ll need to adjust the carburetor accordingly. Another factor that can affect carburetion is temperature. Cold weather will also cause your engine to run leaner, so it’s important to make sure that your carburetor is jetted properly for both warm and cold weather riding.
Additionally, if you’ve made any engine or exhaust system modifications, that can also affect the carburetion and may require rejetting. The other primary reason carburetors need to be jetted is that they get dirty. Over time, the jets and passages in the carburetor can become clogged with dirt and debris, which will restrict fuel flow and cause the engine to run lean. Lastly, if you want to fine-tune the performance of your engine, rejecting the carburetor is often the best way to do it.
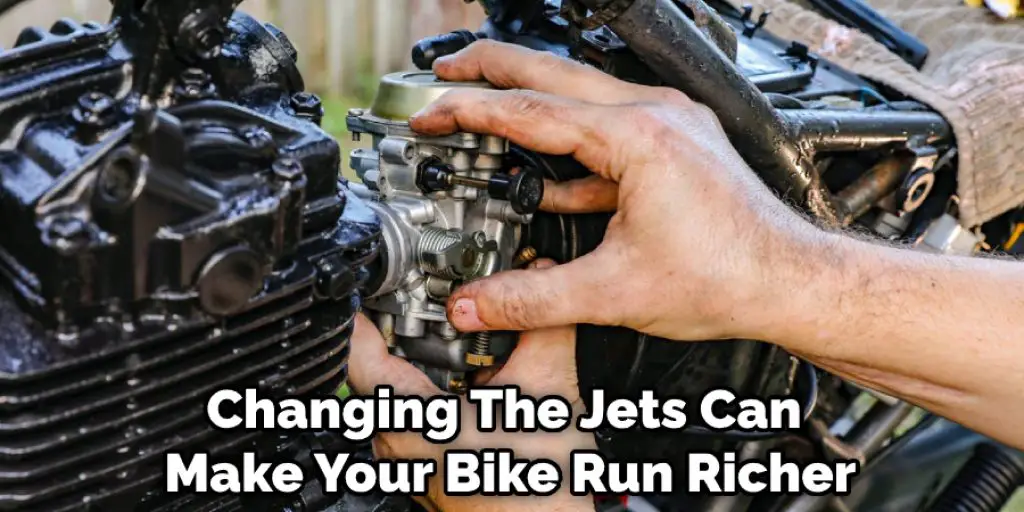
Why Jetting Is Important
Jetting is important because it allows you to fine-tune the performance of your bike. Changing the jets can make your bike run richer or leaner, depending on your goal. For example, if your bike is running too hot and you want to reduce engine temperature, you would jet it leaner. Conversely, if you’re looking for more power, you would jet it richer.
Another reason jetting is important is that it can help your bike run more efficiently. If your carburetor is jetted too rich, you’ll be wasting fuel. And if it’s jetted too lean, you could be damaging your engine. So it’s important to get it just right! Finally, jetting can also affect the way your bike idles. If the carburetor is set too rich, the engine will idle roughly. If it’s too lean, the engine will idle erratically or stall.
Step by Step How to Jet a Dirt Bike Carburetor
1. Understand the Basics of Carburetors
The first step in learning how to jet a dirt bike carburetor is to understands the basics of how carburetors work. A carburetor’s job is to mix the air and fuel together in the correct ratio so that the engine can run. The carburetor does this by drawing air in through the air filter and then mixing it with fuel in the jets. The mixture is then drawn into the engine, where it is combusted. If the carburetor is not mixing the air and fuel correctly, the engine will run poorly.
2. Choose the Right Size Jets
The next step is to choose the right size jets for your carburetor. The type of carburetor will determine the jet size. For example, a Keihin carburetor uses different jets than a Mikuni carburetor. So it’s important to know what type of carburetor you have before ordering jets. Additionally, the engine size and modifications will also determine the jet size. For example, a stock 250cc engine will require different jets than a modified 250cc engine.
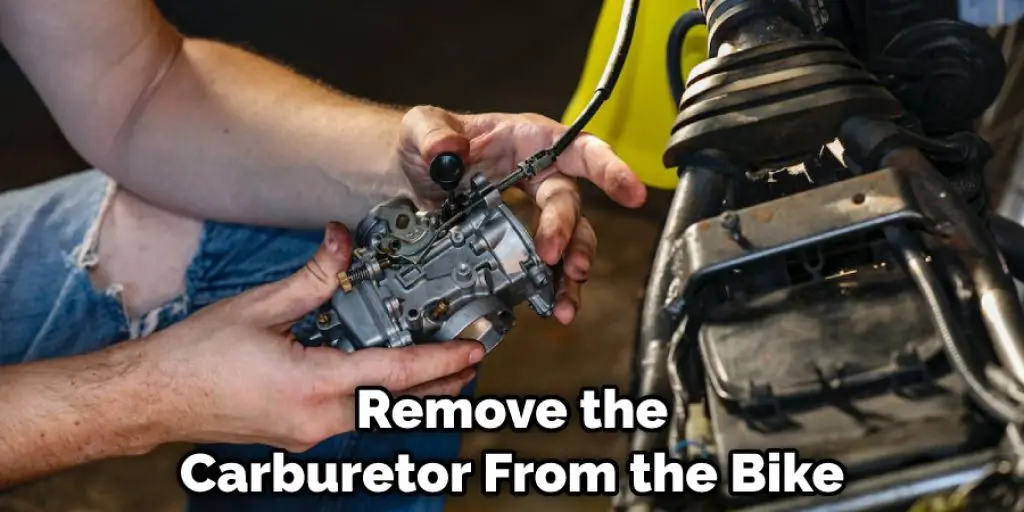
3. Remove the Carburetor
Once you have the correct size jets, the next step is to remove the carburetor from the bike. This is usually a pretty simple process, but it can vary depending on the bike. First, remove the air filter. Then, locate the carburetor and disconnect the cables and hoses. Finally, remove the carburetor bolts and lift the carburetor off of the bike. If you’re having trouble removing the carburetor, consult your bike’s service manual.
4. Disassemble the Carburetor
The next step is to disassemble the carburetor. This is usually a pretty simple process, but it can vary depending on the type of carburetor you have. First, remove the carburetor bowl and float. Then, remove the jets and jet needles. Finally, remove the throttle valves and diaphragms. Most carburetors will have similar parts, but they may be arranged differently. Consult your carburetor’s manual for specific instructions.
5. Clean the Carburetor
The next step is to clean the carburetor. This is an important step because it will remove any dirt and debris that could clog the jets or passages. There are a few different ways to clean a carburetor, but the most effective way is to use a carburetor cleaner and a brush.
First, remove the carburetor from the engine and disassemble it. Next, soak all of the parts in the carburetor cleaner for 30 minutes. After 30 minutes, use a brush to scrub all of the parts clean. Finally, rinse all of the parts with clean water and dry them with a cloth.
6. Adjust the Air/fuel Screw
The next step is to adjust the air/fuel screw. This screw controls the amount of air that mixes with the fuel in the carburetor. If the carburetor is jetted too lean, you will need to turn the air/fuel screw out (counterclockwise) to let more air in. If the carburetor is jetted too rich, you will need to turn the air/fuel screw in (clockwise) to let less air in.
Try turning the air/fuel screw 1/4 turn at a time and then test riding the bike to see if the problem is fixed. Avoid turning the screw more than one turn in either direction, as this can damage the carburetor.
7. Replace the Main Jet
The next step is to replace the main jet. The main jet controls the amount of fuel that flows through the carburetor. If the carburetor is jetted too lean, you will need to replace the main jet with a larger one. If the carburetor is jetted too rich, you will need to replace the main jet with a smaller one. Try replacing the main jet with one that is two sizes larger or smaller than the original. If this doesn’t fix the problem, you may need to replace the main jet with a different size.

6. Install a Larger Pilot Jet
The next step is to install a larger pilot jet. The pilot jet controls the amount of fuel that flows through the carburetor at idle. A larger pilot jet will allow more fuel to flow, which will help to keep the engine running smoothly at higher speeds. First, remove the old pilot jet from the carburetor to install a larger pilot jet. Then, unscrew the new pilot jet from its packaging and screw it into the carburetor in its place.
7. Adjust the Throttle Stop Screw
The next step is to adjust the throttle stop screw. The throttle stop screw controls the amount of throttle that can be applied before the engine starts to bog down. To adjust the throttle stop screw, first find the sweet spot where the engine runs without bogging down. Then, turn the throttle and stop screw clockwise until the engine just starts to bog down. Finally, turn the throttle stop screw counterclockwise until the engine runs smoothly again.
8. Tune the Carburetor
The final step is to tune the carburetor. This is a process of adjusting the jets and screws until the engine is running smoothly. To do this, you will need a carburetor tuning kit. First, loosen the screws that hold the carburetor in place. Next, remove the carburetor and clean it with a carburetor cleaner. Once the carburetor is clean, reinstall it and tighten the screws. Finally, adjust the jets and screws until the engine is running smoothly. If you are not sure how to do this, consult a professional mechanic.
9. Test the Bike
The last step is to test the bike. Take it for a ride and see how it runs. If it seems to be running well, then you are finished. If it is still running lean or rich, you may need to adjust the jets or screws again. If you are still having trouble, consult a professional mechanic.

Tips and Warnings on How to Jet a Dirt Bike Carburetor
Tips:
- Be sure to have the right tools. You will need a set of carburetor adjustment screws, a flathead screwdriver, and a feeler gauge.
- Adjust the fuel screws gradually. Turn each screw one-quarter turn at a time and test ride the bike in between each adjustment.
- Be careful not to over-tighten the screws.
- Make sure the engine is warm before making any adjustments.
Warnings:
- Don’t adjust the carburetor while the engine is running.
- Be careful not to drop any tools into the carburetor.
- Don’t make any drastic changes to the carburetor settings. Instead, gradually adjust the one-quarter screws turn at a time.
- If you’re not comfortable working on the carburetor, take the bike to a qualified mechanic.
Conclusion
So there you have it, a step-by-step guide on how to jet a dirt bike carburetor. Be sure to follow the steps carefully and make adjustments gradually. With a little patience and some trial and error, you should be able to get the carburetor tuned properly. Thanks for reading!
Darren Matlock
Hi, I'm Darren. I love dirt bikes and everything about the off-road lifestyle. I'm passionate about motorbikes, cars, racing sports and going on adventures. If you're like me and enjoy extreme sports, you've come to the right place! I like to write articles about dirt bikes to help beginners get started. Whether you're interested in buying a dirt bike, ATV, motorcycle or want to ride for hobby, I hope my articles will inspire you to learn more about how this machine can be used to ride.