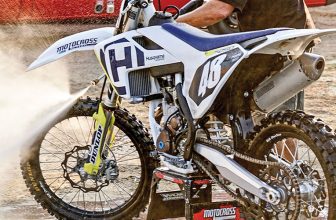
How to Clean Inside of Dirt Bike Exhaust
Dirt bikes are a lot of fun to ride, but they can be quite dirty. The dirt and dust that accumulates in the exhaust system are not only unsightly it also emits unhealthy fumes into the air when you start your bike. But there’s no need to worry because cleaning a dirt bike exhaust is actually very easy. This article will discuss a straightforward process on how to clean inside of dirt bike exhaust.

A Process on How to Clean Inside of Dirt Bike Exhaust
Section 1: Tools and Materials
The equipment you will need for cleaning includes:
Goggles, Gloves, Long sleeve shirt, Zip ties, Socket wrench set with sockets from 10mm to 17mm (to remove the exhaust pipe), Flat screwdriver or knife, Piece of cardboard cut one foot long and three inches wide (will explain later) Two cans of carb cleaner spray. One can be enough, but you might as well use two if it makes you feel more comfortable.
Plenty of rags or paper towels to wipe everything down once done. Wire brush attachment for your drill is used to remove rust or stubborn components on bicycles or motorcycles. The steel wire brushes usually come in a hand-sized metal ring attached in a U shape arrangement.
Section 2: Steps to Cleaning the Exhaust System
Step 1:
Remove the muffler from the pipe. Screws usually hold on to it, so unscrew them and place the muffler aside. Make sure not to drop any of the screws into your engine, or you might have to take off your gas tank to retrieve it.
Step 2:
Take off your gas tank if you dropped a screw inside.
Step 3:
Remove both pipes from where they connect, as well as from where they connect with your exhaust pipe. Bolts usually hold on to it, so use a socket wrench set to unscrew them all but make sure not to lose any parts such as washers or nuts.
Step 4:
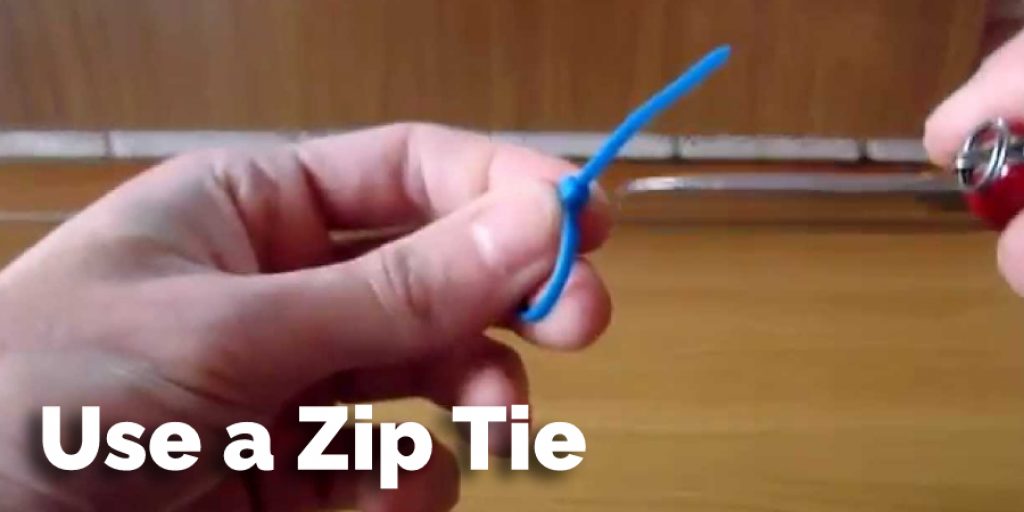
Once removed, use a zip tie to hold together the end of one pipe and use another zip tie at the opposite end of the same pipe (see photo). Then push it up into your bike’s muffler enclosure through an open space vertically. Do this with both pipes.
Step 5:
Use the flat screwdriver (or knife) to scrape off any built-up residue on your muffler. If there is the gunk that won’t come off, this is where you will use your wire brush attachment for your drill. Pull out a length of steel wire and attach it to your wire brush. Ensure none of the wires are exposed, or else they can puncture other components in the engine area.
A good rule of thumb is to pull out about an inch-long worth of wire from each side until you have 4-5 inches total (that’s enough). It should be slightly bent like in the photo below but don’t worry if they aren’t uniformed lengths because 2″ works fine too. It’s just easier to do with 3″ or longer.
Step 6:
Attach your wire brush attachment and start scrubbing the inside of your muffler enclosure. Keep in mind that this can get messy, so use plenty of rags or paper towels to wipe up excess liquid later. Make sure you get past all layers/parts of your muffler and its neck area where crevices tend to gather a lot of junk, like in the photo below.
Do not worry if you puncture holes in some areas because they will be patched up with steel wool when the time comes. The main idea is to scrape off any rust, gunk, residue buildup from inside to perform better after reassembly and subsequent cleaning.
Step 7:
Once all the junk has been removed, take a rag and wipe off excess liquid/residue that may have spilled out. Then use another zip tie to hold together one end of each pipe. Put them aside for now while you clean the muffler enclosure using your wire brush tool.
Step 8:
Using your wire brush tool again, very gently scrub around the inside of your muffler enclosure and its neck area (for gunk build-up). Ensure not to create holes in any areas because they will be patched up with steel wool later on. Do not apply too much pressure, or you might puncture a hole in it, which you want to avoid. Also, keep in mind that the muffler enclosure also has a hole in it, so if you puncture that, you will have some very loud and embarrassing/disastrous problems when riding.
Precautions While Cleaning the Inside of Dirt Bike Exhaust
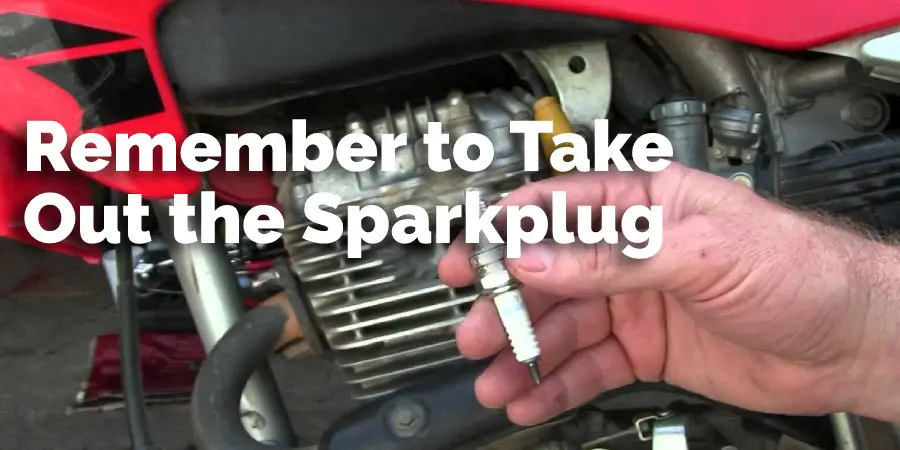
- Before you start, remember to take out the sparkplug. This is a crucial step that can cause serious injury if you choose to ignore it. Dirt bike exhaust pipes get extremely hot as they go through combustion, and having your knuckles or other body parts too close to them can be dangerous.
- Avoid using harsh cleaners. The inside of your exhaust pipe usually consists of fragile, soft metal, and the last thing you want to do is scrub it with something that will damage or pit it.
- Wear protective clothing and eye gear. It’s important to protect yourself while working on projects like this because even if you’re careful, the metal can get hot enough to burn you pretty severely. It wouldn’t be hard for a piece to fly off the bike and hit you in the face either, so take precautions and use common sense!
How Often Should I Clean My Dirt Bike’s Muffler?
Like most things, that’s up to how much you ride and how often you use your bike. If it sits for long periods without being used or if you’re one of those people who like to go out on the weekends just for an hour-long ride, chances are cleaning once a year will be enough. For more frequent riders, however, maybe even every two months is needed.
Conclusion
Lastly, I hope that the process I have stated here will help you learn how to clean inside of dirt bike exhaust. Also, ensure proper safety while cleaning this part. Thank you, and have a good day!
You may read also: Best Exhaust for Yz450f
Darren Matlock
Hi, I'm Darren. I love dirt bikes and everything about the off-road lifestyle. I'm passionate about motorbikes, cars, racing sports and going on adventures. If you're like me and enjoy extreme sports, you've come to the right place! I like to write articles about dirt bikes to help beginners get started. Whether you're interested in buying a dirt bike, ATV, motorcycle or want to ride for hobby, I hope my articles will inspire you to learn more about how this machine can be used to ride.