How to Install Dirt Bike Crankshaft
Installing a dirt bike crankshaft can seem daunting, but it can be a breeze with the right instructions. In this article, we will walk you through the steps needed to get your new crankshaft installed and running like new. So, whether you’re a seasoned pro or a complete novice, read on for all the information on how to install dirt bike crankshaft!
What Is a Dirt Bike Crankshaft?
The crankshaft of a dirt bike is a key component of the engine, responsible for converting the up-and-down motion of the pistons into rotational energy. The crankshaft is connected to the pistons by a series of connecting rods, and it is typically made from forged steel or aluminum. The crankshaft also has several other important functions, including driving the camshaft and operating the oil pump.
Because of its vital role in the engine, the crankshaft must be strong enough to withstand extreme pressures and temperatures. As a result, dirt bike crankshafts are designed to be extremely durable and withstand years of hard riding.
Why Should You Install Dirt Bike Crankshaft?
There are many reasons why you should install a dirt bike crankshaft. Crankshafts are an essential part of any dirt bike engine, and they play a key role in determining the performance of your bike. By installing a high-quality crankshaft, you can significantly improve the power and efficiency of your engine. Additionally, dirt bike crankshafts are designed to withstand the extreme conditions often encountered during off-road riding.
By installing a crankshaft specifically designed for off-road use, you can help ensure that your engine will be able to handle the demands of rugged terrain.
How to Install Dirt Bike Crankshaft in 5 Easy Steps
Installing a dirt bike crankshaft can be a daunting task. But with the right instructions, it can be a breeze. In this how-to guide, we will walk you through the steps necessary to install your dirt bike crankshaft.
Step 1: Remove the Old Crankshaft
Before you can install a new crankshaft, you’ll need to remove the old one. Begin by disconnecting the negative battery terminal. Next, remove the engine covers and any other components in the way of the crankshaft. Once everything is clear, use a wrench to loosen the main bolt that holds the crankshaft. With the bolt removed, you should be able to pull the old crankshaft out of the engine.

Step 2: Clean and Prep the Engine Block
Once the old crankshaft is out, take some time to clean up the engine block. This will ensure that your new crankshaft has a clean surface to mate with. You can use a degreaser and a brush to remove any built-up grime. Once the area is clean, dry it completely before moving on.
Step 3: Install the New Crankshaft
With the engine block prepped, you’re now ready to install the new crankshaft. Start by aligning the new crankshaft with the main bearing journals. Once everything is lined up, begin threading in the main bolt by hand. Once the bolt starts, use a wrench to tighten it to specifications. Be sure not to overtighten! Finally, you can reassemble the engine covers and reconnect the battery terminal with the new crankshaft.
Step 4: Test It Out
Once everything is back in place, it’s time for a test run. First, ensure the bike is in a safe and level area, then start it up and let her rip! If all goes well, you should be good to go. If not, check all your bolts and connections to make sure they’re tight, then try again.

Step 5: Take a Professional Help
If you are not comfortable with the process or do not have access to the required tools, it is advisable to take help from a professional mechanic. This will ensure that the installation is done correctly and there are no issues later.
That’s it! You’ve now learned how to install dirt bike crankshaft. Be sure to take things slowly at first and double-check all your bolts before heading out for a ride. With a little care and patience, you should be able to get the job done right.
You Can Check It Out to Make My Dirt Bike Louder
How to Inspect Dirt Bike Crankshaft for Damage?
The crankshaft is an essential part of any dirt bike engine and needs to be in good condition to ensure that the engine runs smoothly. There are a few different ways to inspect the crankshaft for damage, and the most important thing is to be thorough. First, take a look at the bearings. If they are cracked or damaged, then it is likely that the crankshaft is also damaged. Next, check for any cracks or chips in the metal.
Finally, spin the crankshaft by hand and listen for any unusual noises. If you hear any grinding or popping sounds, then it is time to replace the crankshaft. By following these simple steps, you can be sure that your dirt bike engine will be in good condition and continue running smoothly.

How to Clean Dirt Bike Crankshaft
Over time, your dirt bike’s crankshaft can become covered in dirt and grime, affecting its performance. You’ll need a few supplies to clean your crankshaft, including a cleaning brush, rag, and some degreaser. Once you have everything you need, follow these steps:
- Start by removing loose dirt and debris from the crankshaft with a brush.
- Next, soak a rag in degreaser and wipe down the crankshaft to remove any stubborn grime.
- Finally, rinse the crankshaft with water and dry it off with a clean rag.
If you regularly clean your crankshaft, you can help extend its lifespan and keep it running like new. Keep reading for more information about how to install dirt bike crankshaft.
10 Mistakes People Make When Installing a Dirt Bike Crankshaft
Before you install your dirt bike crankshaft, there are a few things you need to know to avoid making common mistakes. Here are 10 of the most common mistakes people make when installing a crankshaft:
- Not cleaning the crankshaft before installation.
- Not lubing the crank bearings before installation.
- Not torquing the main bearings properly.
- Not setting the end play correctly.
- Not properly aligning the connecting rod journals.
- Failing to check for bent rods or damaged crankpins.
- Using the wrong size bolts or washers.
- Overtightening the bolts and damaging the threads.
- Forgetting to install the oil seals or putting them in backward.
- Not checking for leaks after installation.
By taking the time to avoid these mistakes, you can be sure that your crankshaft will be installed correctly and perform as it should for years to come.
The Benefits of Installing a Dirt Bike Crankshaft Properly
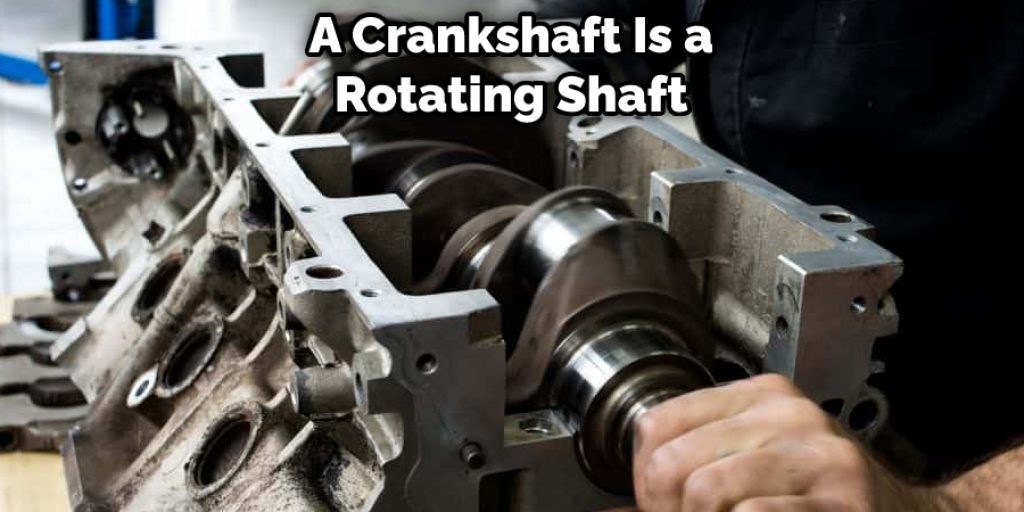
Any Dirt Bike enthusiast will tell you that one of the most important aspects of maintaining a Dirt Bike is ensuring that the crankshaft is properly installed. A crankshaft is a rotating shaft that converts reciprocating motion into rotating motion. It allows the pistons to move up and down in the cylinders. The crankshaft is a vital part of the Dirt Bike’s engine, and if it is not installed properly, it can lead to several problems. For example, an improperly installed crankshaft can cause the engine to overheat, damaging the piston rings and cylinders.
Additionally, an improperly installed crankshaft can cause the connecting rods to break, resulting in engine failure. Therefore, as you can see, the crankshaft must be installed correctly. Fortunately, a few simple tips can help you ensure that your crankshaft is properly installed. First, make sure that the connecting rod-bearing journals are properly aligned with the crankpin journals.
Second, ensure that the connecting rods are properly torqued to your owner’s manual specifications. Third, make sure that the main bearings are properly torqued to the specifications in your owner’s
How to Choose the Right Dirt Bike Crankshaft for Your Needs
When it comes to dirt bikes, the crankshaft is a key component. This rotating shaft transmits power from the engine to the wheels and houses the connecting rods and pistons. As a result, it plays a critical role in determining the performance of your dirt bike. When choosing a crankshaft for your bike, there are a few factors to consider. Firstly, you need to consider the displacement of your engine. This will determine the length of the crankshaft you need.
Secondly, you need to consider the material of the crankshaft. Here, you have a choice between steel and aluminum. Steel is stronger but heavier, while aluminum is lighter but less strong. Finally, you need to consider the price. Dirt bike crankshafts can range in price from a few hundred dollars to several thousand dollars.
Ultimately, the right crankshaft for your needs depends on various factors. However, with careful consideration, you can choose a crankshaft to help you get the most out of your dirt bike.
Conclusion
Installing a dirt bike crankshaft can be a daunting task for the inexperienced. By following these simple steps, however, you can have your crankshaft installed in no time! If you still feel unsure after reading this guide or run into any problems while installing your new crankshaft, don’t hesitate to contact a professional mechanic for help. Thanks for reading our post about how to install dirt bike crankshaft.
Darren Matlock
Hi, I'm Darren. I love dirt bikes and everything about the off-road lifestyle. I'm passionate about motorbikes, cars, racing sports and going on adventures. If you're like me and enjoy extreme sports, you've come to the right place! I like to write articles about dirt bikes to help beginners get started. Whether you're interested in buying a dirt bike, ATV, motorcycle or want to ride for hobby, I hope my articles will inspire you to learn more about how this machine can be used to ride.