How to Change Oil on Dirt Bike
If you own a dirt bike, then you know that one of the most important maintenance tasks is changing the oil. Not only does this ensure that your bike will run smoothly, but it also prolongs the life of your engine. In this blog post, we’ll walk you through the process of changing the oil in your dirt bike step-by-step. So keep reading to learn more about how to change oil on dirt bike.
Why Should You Change Oil on Dirt Bike?
Like any other vehicle, a dirt bike needs regular maintenance to keep running smoothly. One of the most important tasks is changing the oil. Engine oil helps to lubricate the engine parts and prevents them from overheating. Over time, however, the oil breaks down and becomes less effective. That’s why it’s important to change the oil regularly.
Depending on how often you ride, you may need to change the oil every few months or so. While it may seem like a lot of work, changing the oil is relatively easy and only takes a few minutes. Plus, it’s a good opportunity to check for other maintenance issues, such as leaks or worn parts. By taking care of your bike, you can help to extend its life and ensure that it continues to perform at its best.
What You’ll Need
- Drain pan
- Wrench or socket set
- Ratchet
- Funnel
- Oil filter (check your owner’s manual for the recommended type)
- Fresh oil (again, check your owner’s manual for the recommended type and amount)
7 Tips to Follow on How to Change Oil on Dirt Bike
1. Check Your Owner’s Manual
The first step in changing your dirt bike’s oil is to check your owner’s manual. Your owner’s manual will specify what type and how much oil to use in your bike. It is important to follow these instructions carefully to avoid damaging your bike.
2. Warm Up Your Bike
Before you begin changing your oil, it is important to warm up your bike. This will help loosen the old oil and make it easier to drain. To warm up your bike, simply ride it for a few minutes or until the engine is warm.

3. Place Your Bike on a Stand
Once your bike is warmed up, you must place it on a stand to change the oil. If you do not have a stand, you can place your bike on a piece of cardboard or a towel. This will help keep your bike from slipping while working on it.
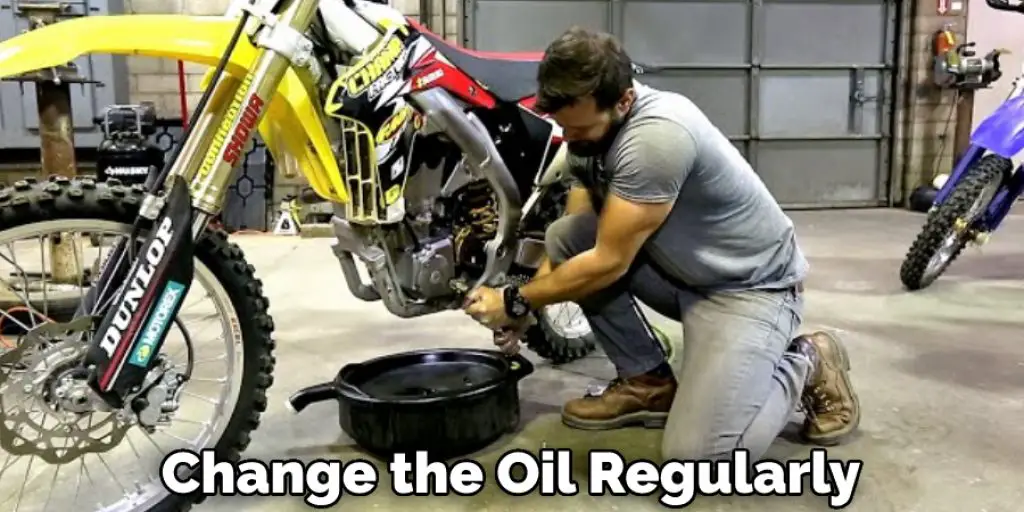
4. Remove the Oil Drain Plug
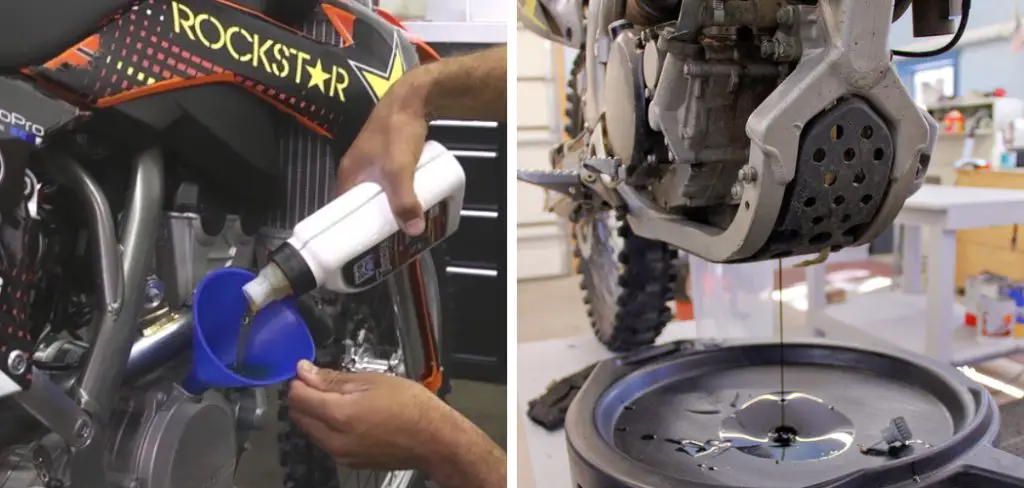
The next step is removing the oil drain plug at the engine’s bottom. Once the plug is removed, allow the old oil to drain into a container. Be sure to dispose of the old oil properly according to local regulations.
5. Replace the Oil Filter
Once the old oil has drained out, you will need to replace the oil filter. To do this, simply unscrew the old filter and screw in a new one. Be sure to use the same type of filter that was originally installed on your bike.
6. Add New Oil
After replacing the filter, you can add new oil to your bike. Again, be sure to check your owner’s manual for specific instructions on what type and how much oil to use. Once the new oil has been added, screw the oil fill cap back on.
7. Start Your Bike and Check for Leaks
The final step is to start your bike and check for leaks around the oil drain plug and filter. If there are no leaks, you can put your bike away and enjoy riding it with fresh oil!
That’s it! You’ve now learned how to change oil on dirt bike. Be sure to follow these steps carefully to avoid damaging your bike.
What Kind of Oil Should You Use for A Dirt Bike?
There are a few things to consider when choosing the right oil for your dirt bike. The first is the climate you ride in. If you live in a hot climate, you’ll want to choose an oil that won’t break down as quickly in the heat.
Conversely, if you live in a colder climate, you’ll want to choose an oil that won’t thicken and cause problems when starting your bike in the cold. You should also consider the type of terrain you ride on. If you do a lot of off-roading, you’ll want an oil that can handle the increased wear and tear.

Conversely, if you mostly stick to paved trails, you can get away with a less durable oil. Finally, make sure to check your owner’s manual for specific recommendations. Some manufacturers have specific oils they recommend for their bikes. Considering all these factors, you can be sure to choose the right oil for your dirt bike.
How to Tell if Your Dirt Bike Needs an Oil Change
As any motorcycle enthusiast knows, keeping your bike in good condition is essential for a safe and enjoyable ride. One important aspect of motorcycle maintenance is oil changes. Depending on the type of bike and the oil used, most bikes need to have their oil changed every 3,000 to 5,000 miles. However, a few signs indicate it’s time for an oil change even sooner.
If your bike starts making unusual noises, if the oil level drops significantly between changes, or if the oil looks dark and dirty, it’s probably time for a change. Of course, it’s always best to consult your owner’s manual or a certified mechanic before changing your bike’s oil. But, with a little care and attention, you can keep your dirt bike running smoothly for years to come.
The Benefits of Changing the Oil on Your Dirt Bike Regularly
Like any other vehicle, a dirt bike needs regular maintenance to run smoothly. One of the most important things you can do for your bike is to change the oil regularly. Dirt bikes tend to build up more dirt and grime than street bikes, so it’s important to change the oil more often to prevent engine damage.
Depending on how often you ride, you should change the oil every 4-6 hours of use or every 3 months, whichever comes first. Not only will this help keep your engine clean and running smoothly, but it will also help extend your bike’s life. So if you’re looking for a simple way to keep your dirt bike in good condition, be sure to change the oil regularly.
How Often Should You Change the Oil on Your Dirt Bike?
Although many people think that they need to change the oil on their dirt bike after every ride, this is not necessarily true. Instead, it is important to check the oil level after each ride and to change the oil when it gets low. Additionally, changing the oil more frequently if you ride in dusty or sandy conditions is a good idea, as this can cause the oil to break down more quickly.
Finally, if you do not ride your dirt bike frequently, changing the oil at least once a year is still important to prevent the engine from seizing up. By following these simple guidelines, you can ensure that your dirt bike will stay in good condition for many years to come.
What Are Some Common Problems with Changing the Oil on A Dirt Bike?
One of the most common problems with changing the oil on a dirt bike is getting the old oil out. Because dirt bikes are ridden in such dirty conditions, the old oil can be very difficult to remove. Therefore, it is important to ensure that all of the old oil is removed before adding new oil, or else the dirt bike will not run as efficiently.
Another common problem is overfilling the oil. This can be a problem because it can cause the engine to seize up. Therefore, it is important to check the dipstick regularly to ensure enough oil but not too much.
Lastly, another common problem with changing the oil on a dirt bike is forgetting to add oil to the filter. The filter needs to be replaced regularly to keep the dirt bike running properly, and if there is no oil in the filter, it will not work correctly. So be sure to add oil to the filter before putting it back on the dirt bike.
Where Can I Buy Dirt Bike Oil?
Many people ask themselves where they can buy dirt bike oil. The answer to this question is that you can buy it at many different places. However, the best place to buy dirt bike oil is from a company that specializes in selling it.
This way, you can get the best quality dirt bike oil for your money. In addition, you will also be able to get advice from experts on which type of oil is best for your dirt bike. So if you are looking for the best place to buy dirt bike oil, make sure to check out a company that specializes in selling it.

Conclusion
Now that you know how to change oil on dirt bike, it’s time to get out there and do it! Be sure to follow the steps outlined in this article carefully, and you’ll be able to keep your bike running smoothly for many future rides. Thanks for reading, and happy trails!

